When it comes to getting more blooms from your plants and trees, we’ve begun with the importance and aspects of sunlight. Next, we’ve noted the importance of what we can call the maintenance Basics for your landscape; fertilizing and trimming, a Xeriscape long term Watering strategy and the importance of establishing strong, deep root systems. These are all important to help promote the health, hardiness and longevity of your plants and trees, which in turn can all help to increase the chance of blooms and flowers your landscape is possible of producing for you.
We have touched lightly on drainage situations and soil conditions, mostly in the challenges in determining the right watering balance while promoting root depth and how dense soils can create drainage problems and challenges to root system growth and durability.
The soil density conditions of any property can vary greatly as we’ve mentioned. Regarding new landscape plant, palm and tree materials, the managed soil conditions from nurseries of new plants and trees are very healthy and growth friendly as consistent with being grown in a professional, quality driven farm or nursery.
The farmers or nursery growers may develop their own specific soil nutrient mixes and compositions, along with fertilizer blends, and pest and disease prevention they find produces the best approach to help protect and promote the growth of their plants or trees while they are younger and developing.
For container nurseries the mixtures of soils, many with peat moss and perlite balancing nutrients and porous enough mixes that allow the roots to grow more freely and expand through the containers they might be in.
The plants and trees having been raised in healthy conditions, as we’re only dealing with quality growers, there is going to be an adjustment from those soils, to your own soil at your property, whenever a new planting is made. The healthier your soil conditions, the quicker the new landscape should become rooted and begin to show growth with your proper watering, fertilizing and trimming support when installed properly.
Stress can still occur following the new landscape installation, even with all preparations being properly made and a smooth installation process. We have Landscape Care Notes on our website as a reference to help provide as smooth a transition through those first few months following installation, which is the largest period of adjustments for any new landscape.
The better your soils and your care for the new landscape as noted, the smoother the transition to your property should be. The more difficult the soil conditions, either very porous to very poor draining to cover the extreme points possible, the more adjustments will be needed. We’ll cover some of the most important property adjustments to help with those difficult soil conditions.
A note, expect faster more visible growth during the warmer months of the spring and summer, and likewise, slower growth during the fall and winter.
As the materials from professional growers are coming from farms and nurseries, for anything in containers, such as any plants, , Ornamental or hard wood Trees, or Palm tree varieties, they may be started by seed or cuttings, liners, or a young crop of plant or tree materials and mixed with again, a porous, nutrient rich soil that allows both the quicker germination of the seeds if seeds or cuttings are the crops of some.
Even moving from seed and cuttings to larger plant and tree containers which might vary from #7 , #15, # 25 , up to #200 gallon for some larger growers, this soil mix allows for an easier time for the new tender roots to burst and grow into the soils they are in, and more quickly help to expand and establish themselves.
The short of this point is, most properties soils aren’t this customized to new growth from newly installed landscapes.
This aspect of soil composition, pays attention to not only if a property holds too much water, worse if it was not adequately graded , to the more extreme situations where storm flooding can occur to regularly threaten the home or structure on it during heavier storms.
There are a number of methods during a landscape installation to help deal with poor, dense or poorly draining soil conditions, for example :
1) Landscape grading of the beds and accounting for the flow of rainwater and its ability to leave a planting area and not sit there
2) Adding soils and elevating planting beds before planting
3) Re-directing water by surface grading away from a home or structure
4) Adding drainage if needed to help direct the water from a home or building’s gutter downspouts from flooding a landscape bed area if needed.
What should be common practice in preparation of creating new planting bed areas, before the plants are installed is the effort of grading and elevation of soils as needed to make sure the stormwater will be able to leave a planting bed and not sit there. The reason it is good that the water can leave a planting bed area from heavy rain downpours, especially with poorly draining properties, is that siting water on the surface, especially if remaining damp for extended periods of time, can allow roots to remain close to the surface instead of going deeper into the ground and becoming established. If the ground becomes too water logged and damp regularly, the root systems and ultimately the plant or trees can become rotted from too much dampness and water. This will begin by plants and trees becoming thinner typically, with fewer and fewer leaves and less of a dense healthy canopy of leaves, palms will also get thinner from over watered or areas which do not drain well enough. Ultimately these factors of surface water which does not drain away in hours or a days time typically in some cases, can lead to shallow roots, which are weakened root systems; and in bad enough cases, will prematurely cause the trees and plants to die.
Looking For Small Mushrooms of Fungus in your Mulch, Green Hues on the Ground as signs of too much moisture, maybe even too much Mulch.
If you see a greenish tint or hue on the ground, or little tiny mushrooms that might appear whitish or brown or a mixture of both, about the size of a penny or nickel in diameter in the mulch, your mulch should be loosened and maybe lessened by removing some. The mushrooms are a fungus and if they are present in the mulch, it is a possibility there is too much mulch, which could cause rot on the trunk of a plant or tree if the Mulch is too deep.
What’s too deep when it comes to mulch. First, the great benefit of mulch besides the freshening and dressing up looks of it, is that mulch helps to provide a way to hold in moisture to provide a slow release of that moisture into the soil and for the plants health benefit.
Not all soils are the same density, even in our own Palm Beach County, Florida area where we primarily serve. The coastal towns and cities, more east will typically have a bit more sandy soil with the soil compositions and are better draining. However, we have seen poor drainage conditions in some properties, more rarely, but also on the eastern side of the county.
Mid county, mixed of good soils primarily and can get more dense strains of clay and marl in some properties and sandy soils in others.
Western communities more often have the drainage challenges, new communities as well as the older. Brand new communities can have lacking elevation problems sometimes where properties could use a bit more of an elevation to create better swales between the homes we see. Sometimes this is also mixed with very dense clay or marl which makes the establishment of new root growth on some properties very challenging.
In the worst of situations for poor drainage, exemplified by dense soil conditions where water does not drain easily or quickly into the ground. The soils are often densely compacted with strains of clay or marl present, instead of regular soils which are more porous. Our county and much of Florida has very healthy soils, dark brown and can be found throughout our area. Cities like Belle Glade and Pahokee are known for the richness of their dark brown, black soils which are very rich in nutrients and great soils compared to anywhere.
For your properties with dense, poor draining soils, where lawns are difficult to dry even during the summer months or the more rainy time of year, the lawns could turn into more of a mud slick as the lawn can be damaged or rutted sometimes simply from it being cut. You can slip or fall or easily and quite often track mud into the house if you’re walking in the yard as the lawn and ground area is too slick to walk on sometimes. If this is your situation and your landscape is struggling, you have a soil problem.
Some Planting Techniques that can help for those wanting a healthy landscape with Poorly draining properties :
- Amending the Soil * Elevating the Planting Beds
Here’s a couple of methods that can help with plantings for Poor Draining Properties, beyond the Addition of Gutters and a Drainage system. Amending the soil : Removing and disposing or re-using some where else, the existing dense soil from a hole immediately around the newly planted tree or plant before it is installed. After removing that dense soil, bringing in nutrient rich new topsoils, potting soils even and sand if necessary.
In these situations, soil amendments may be required to help plants and trees become better established. This is unusual for our Central and South Florida area typically and more a practice that is taught more frequently in states north of Florida it may be thought.
Digging out the area for the new plant or tree and then placing the root ball in the hole is generally a successful planting procedure for most of Central and South Florida. With the plants, we like to have them at grade level if not a little higher sometimes, like an inch of the root ball above grade sometimes. This helps to ensure a higher rate of success in planting for us, and the nutrients from the nursery containers put back into the new hole being planted.
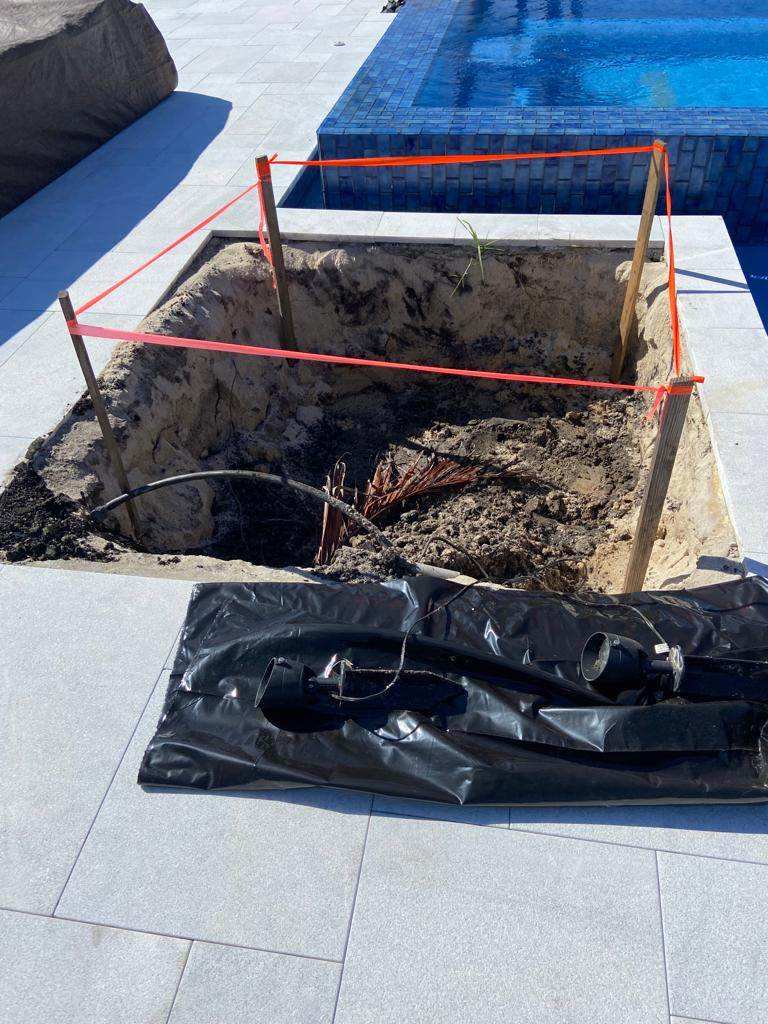
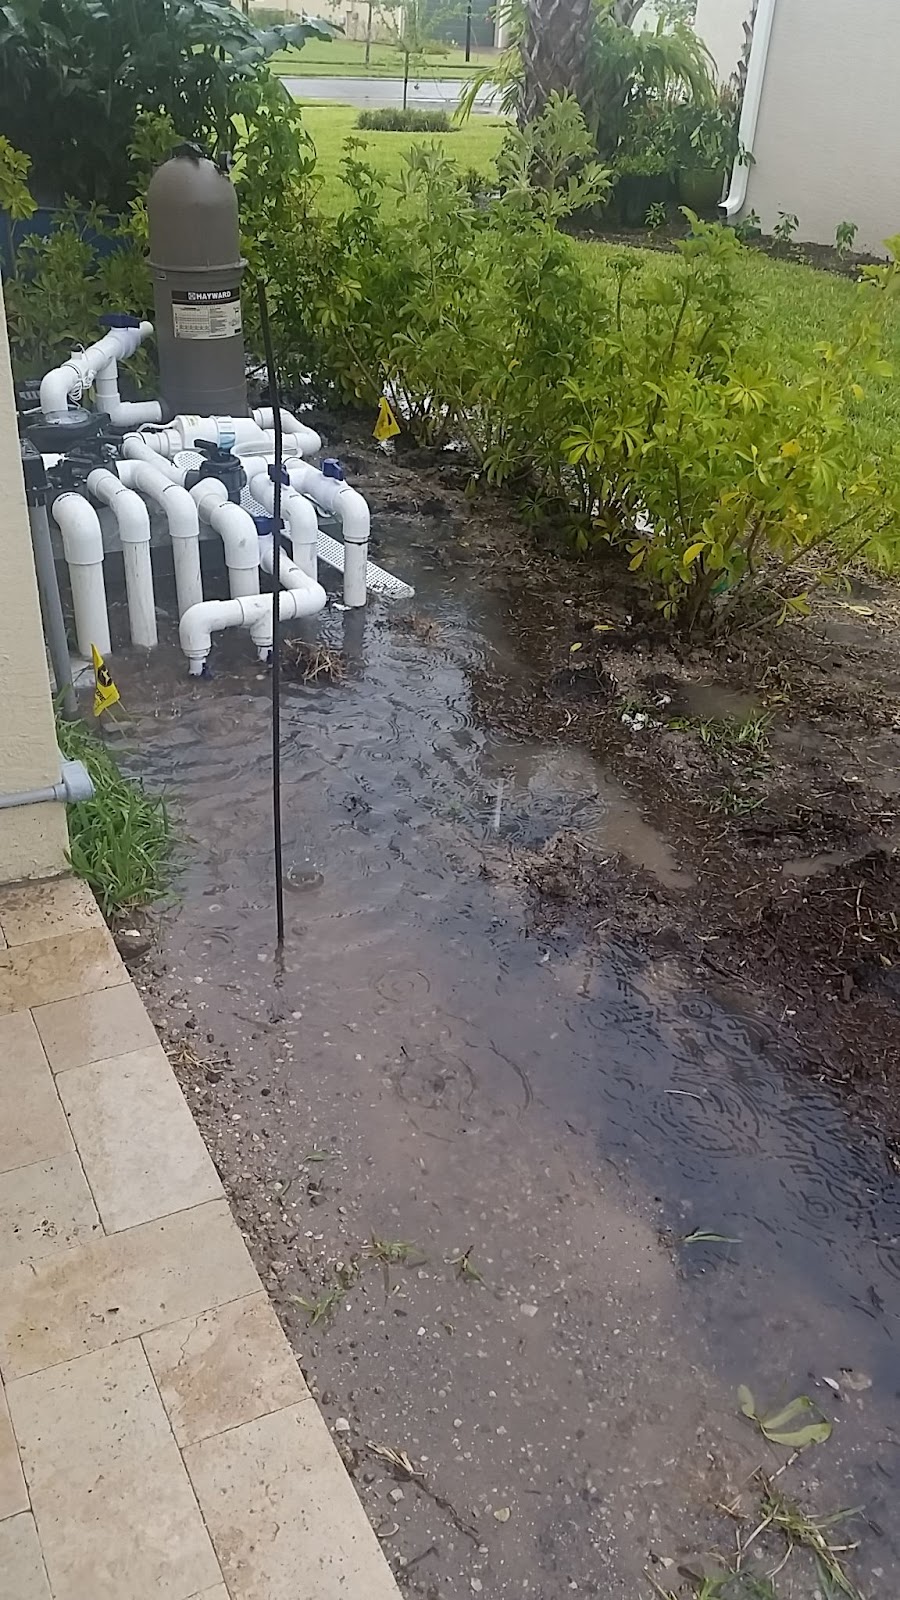
In the photo here, this is an example of a soil amendment being done in a new Western Jupiter community. This is surrounding a new pool that was built at the same time as the new home. One of the first homes in the new development. The soil was so dense that after 6 months, roots from new palm trees had only grown approximately an inch. This kind of root growth of an inch on larger palms, we typically would expect to see in a matter of weeks, we would hope normally. The palm struggled and was not making it. We removed and replaced it and not only did that, but we had to deal with the soil.
Better knowledge of the problems of the neighborhood with drainage would have been helpful, and planning ahead with the pool construction, drains should have been installed before the pool deck was in, allowing water to more rapidly escape the planter pocket areas of the pool.
With the root ball being approximately 4 to 5 wide, the remaining soil around where the palm was removed. The dense clay, marl like soil and replaced with topsoil and even a little sand mix to help make it more porous. Adding in fertilizers with the new tree, organics like Milorganite and slow release fertlizers, this helped to create the ability, for at least around the immediate area, of 1 to 2 feet surrounding the palm, the roots could grow and find a wealth of nutrient rich soil to help it acclimate to its new home.
Previously, the roots were welcomed by a soil composition, like a wall it was so dense with marl and clay that existed, the roots were not strong enough to penetrate into that and nutrients were lacking.. The palm degraded from its initial beauty until it was ultimately needing replacement as no other treatment but removing the existing immediate surrounding soil and amending the hole with new more porous topsoils helped the new palm transition in a healthy way to be accepted into its new home.
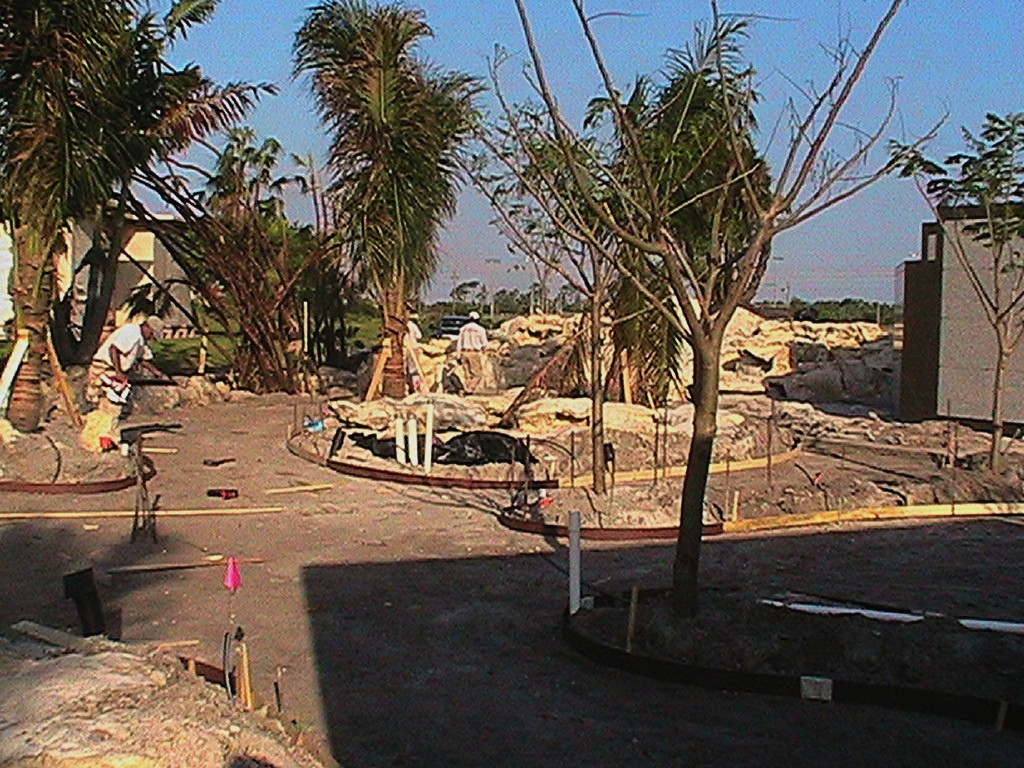
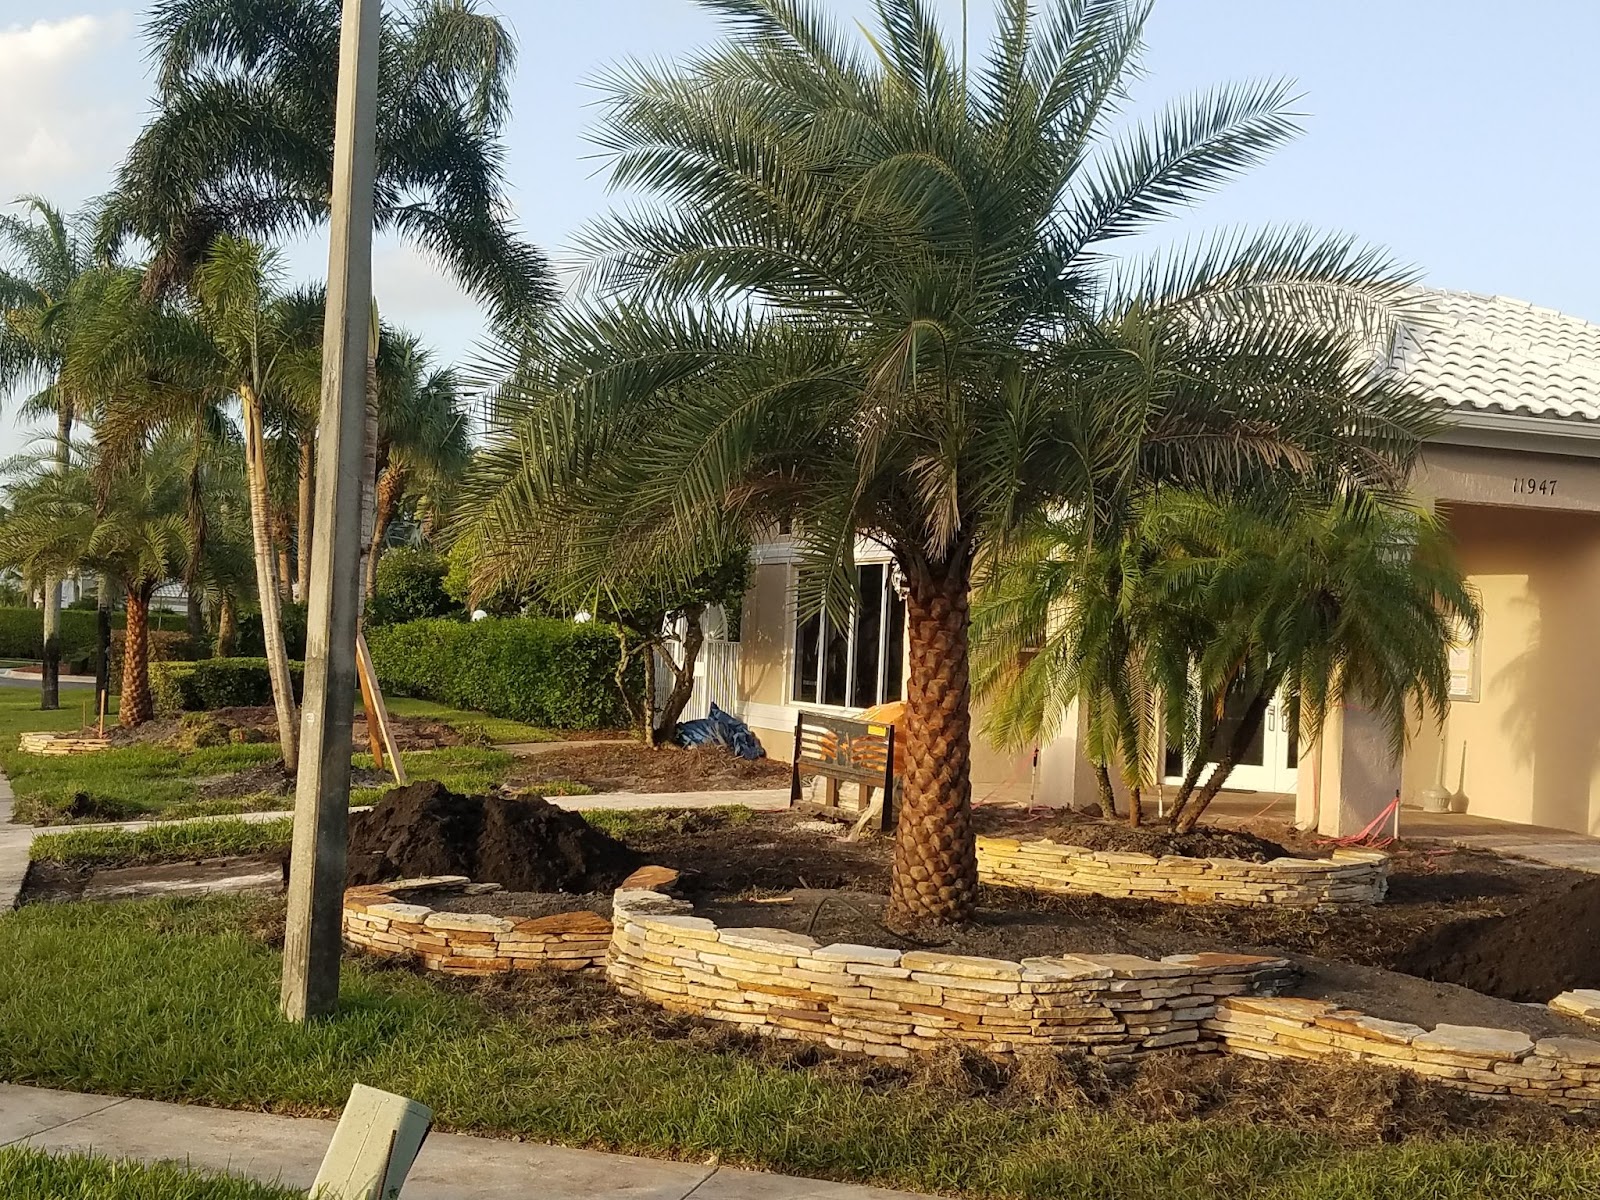
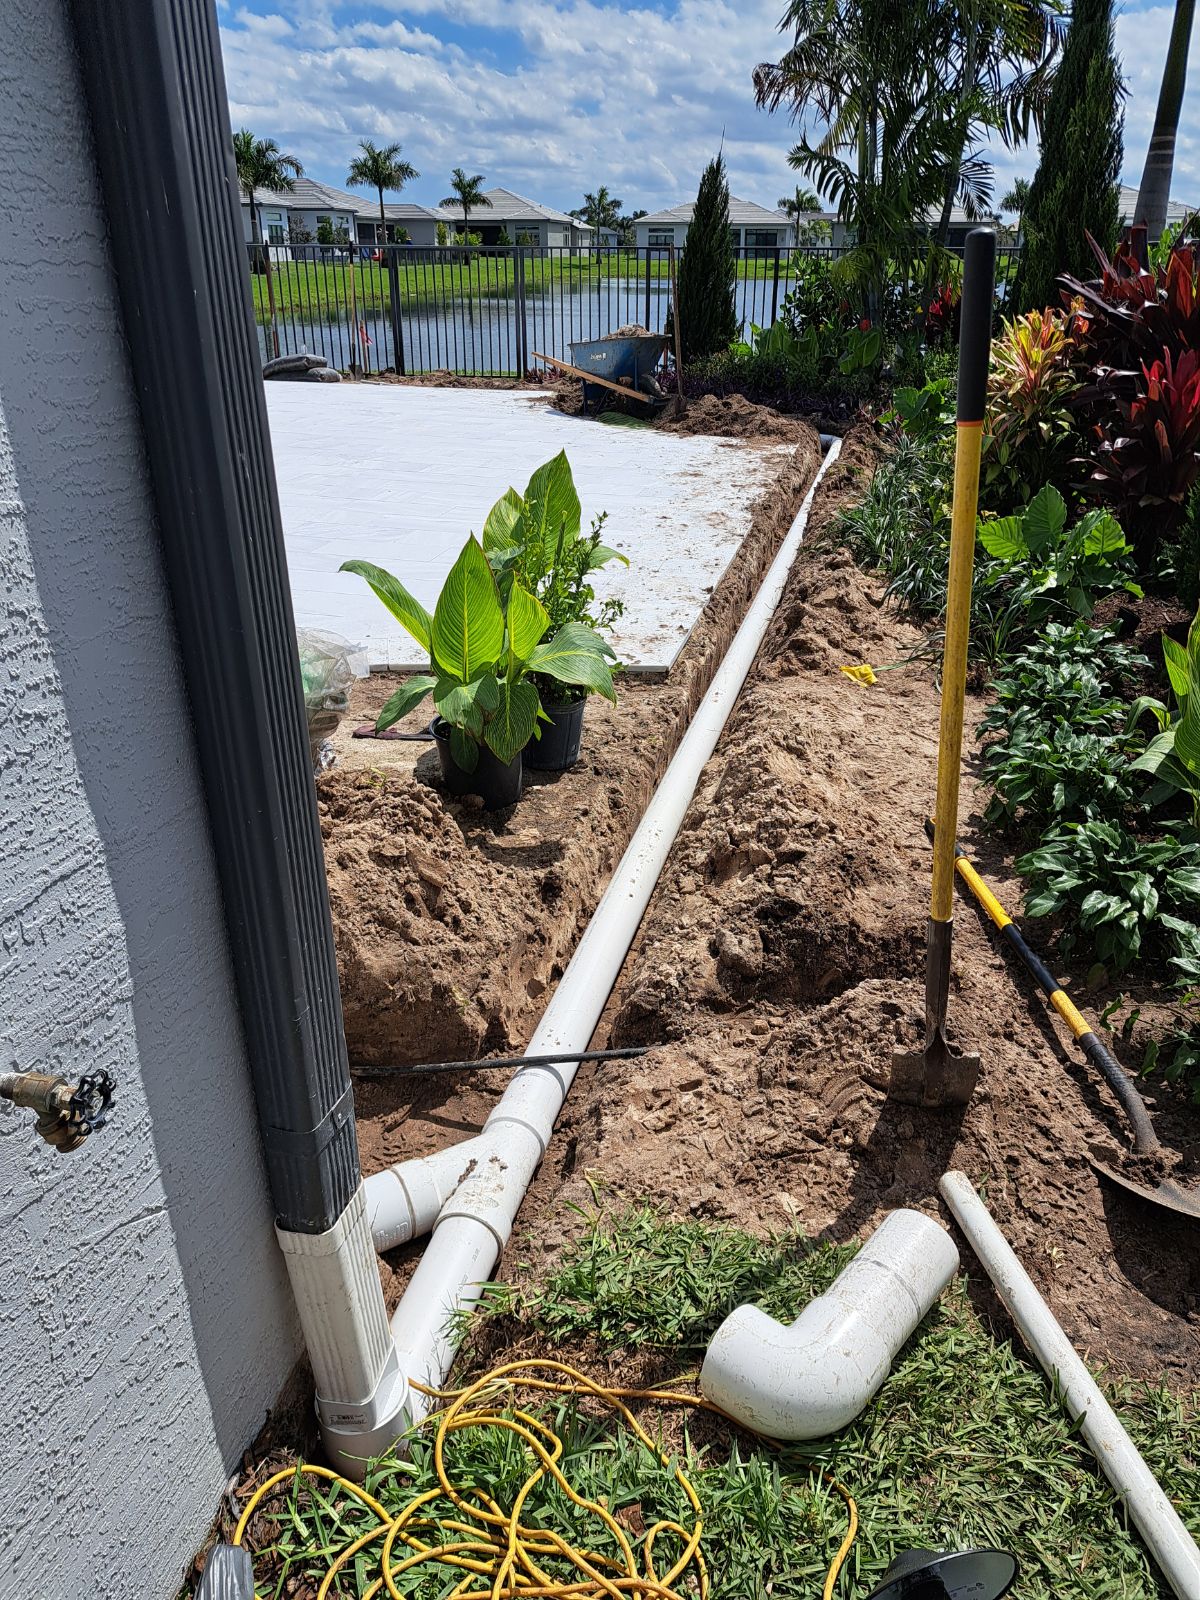
On planting levels for new Palms and Trees, we like to plant close to soil level or a little higher, sometimes and inch or more. Some trees, depending upon the soil conditions, the more dense, we may look to elevate the planting more noticeably about 6” to a 1’ sometimes above regular grade if we can. The photo here of this commercial project where the palm trees have been set and the area is being prepped with concrete wood forms before the concrete pour, we made sure that our palm trees were above the grade level we established, and the tree heights going in are the first really that will set the grade level of the planting beds for the smaller plants that follow. When figuring how high a planting be will be, it begins with the elevations of the trees and palms, once those are set, the grade is established. As we mentioned, the root ball being at grade to an inch above regular grade typically is what is recommended for regular planting soils, higher for poor draining soils.
For areas where we are adding in a Decorative Flagstone Wall in a landscape bed or a small Ornamental Retaining wall as part of a design, we may exaggerate the grade level and elevate the soil more for the aestheics of the look, which continues to help keep roots from sitting in continually dense or damp soils. In these project designs with the accent border walls, the effort is totypically to either elevate the entire planting bed, or creating a terraced flagstone wall, as a part of factor in a design. Point of note, not to build up the soil against the home, or allow for water to be trapped against the wall of the home or structure. Keeping the soil close to grade level on the house wall side of the bed is important to allow for collected rainwater to be able to leave the area.
How much soil to add for new, elevated planting beds in a poorly draining property?
This can vary from adding an inch or light covering to add a surface of nutrients combined with shaping and raising the ground simply by hand grading with a rake, to something more significant with a half a foot to a foot elevation of soil or more. How high the elevation of soil needs to answer 2 points really; 1) is how it looks, an artistic consideration and 2) what is needed to help the roots and this can depend on how dense or poor draining the property is.
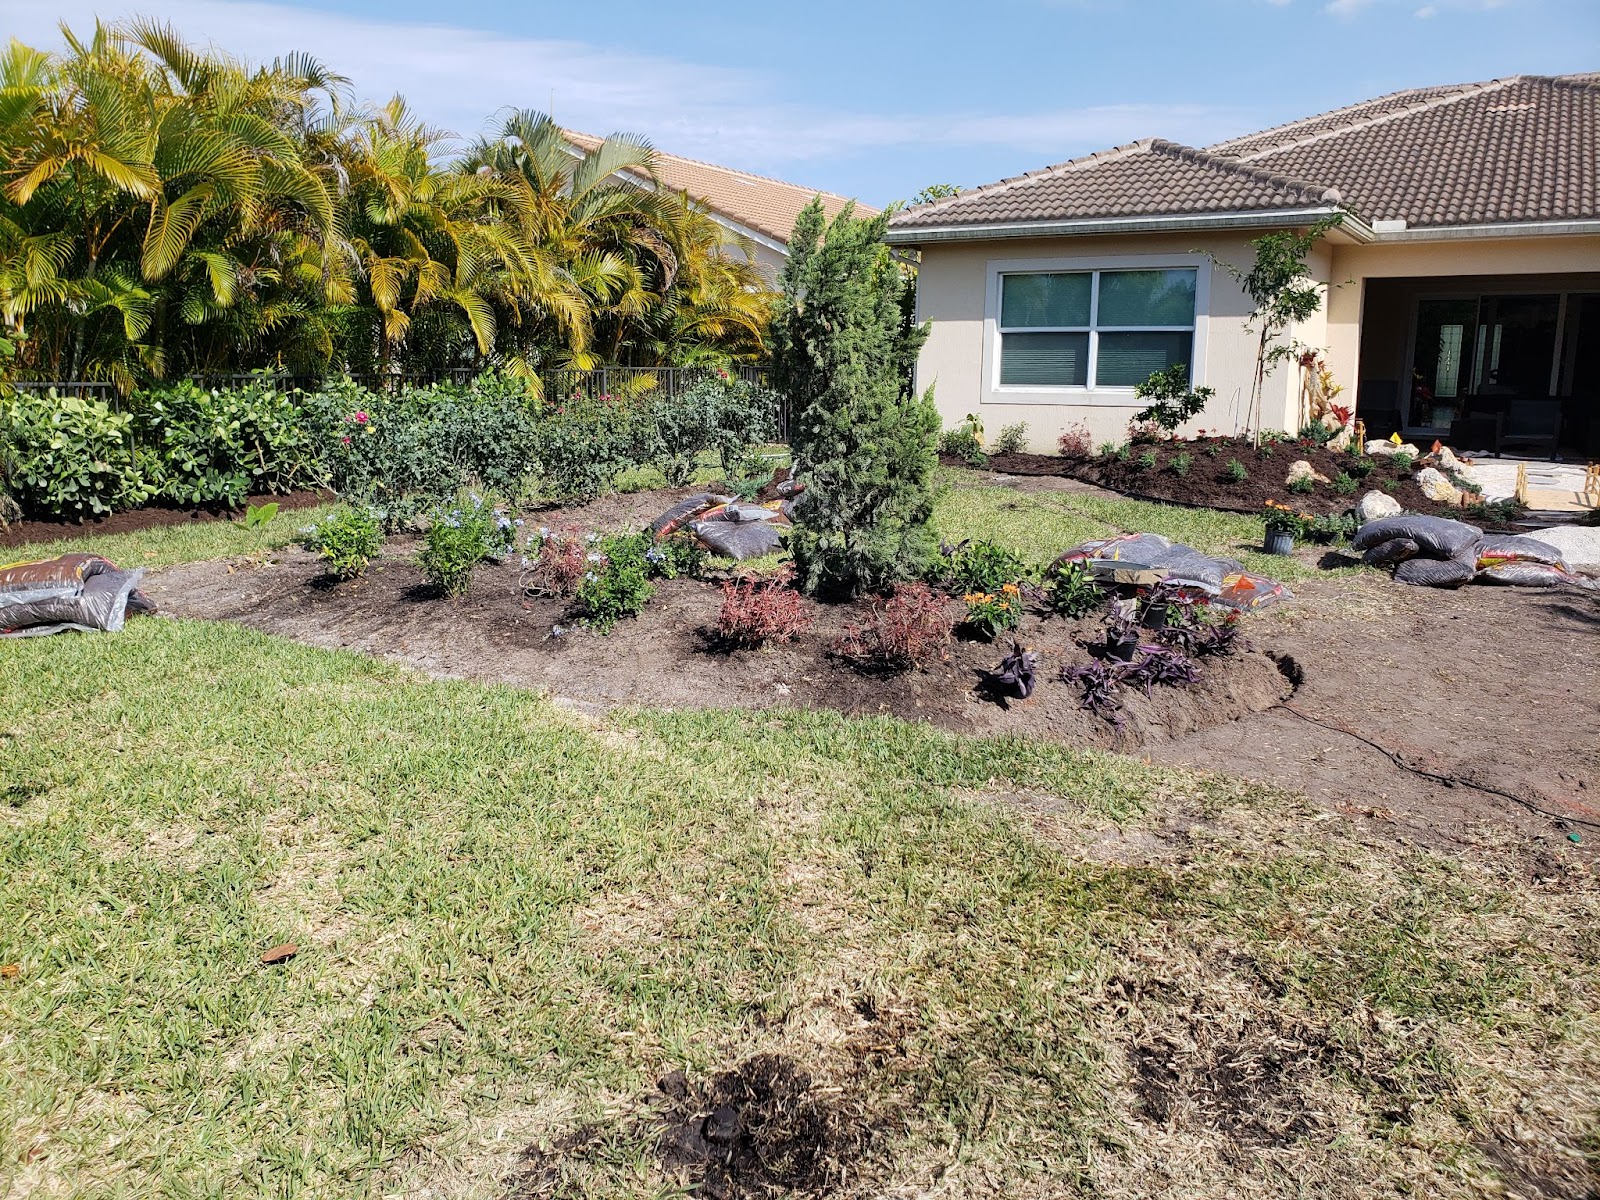
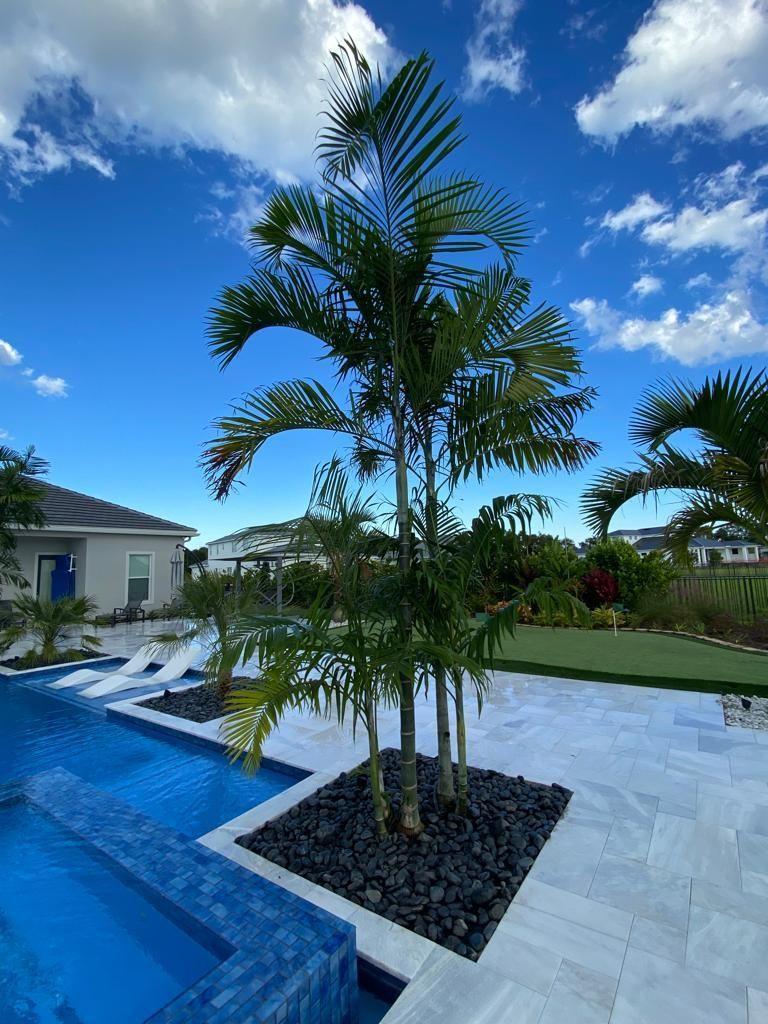
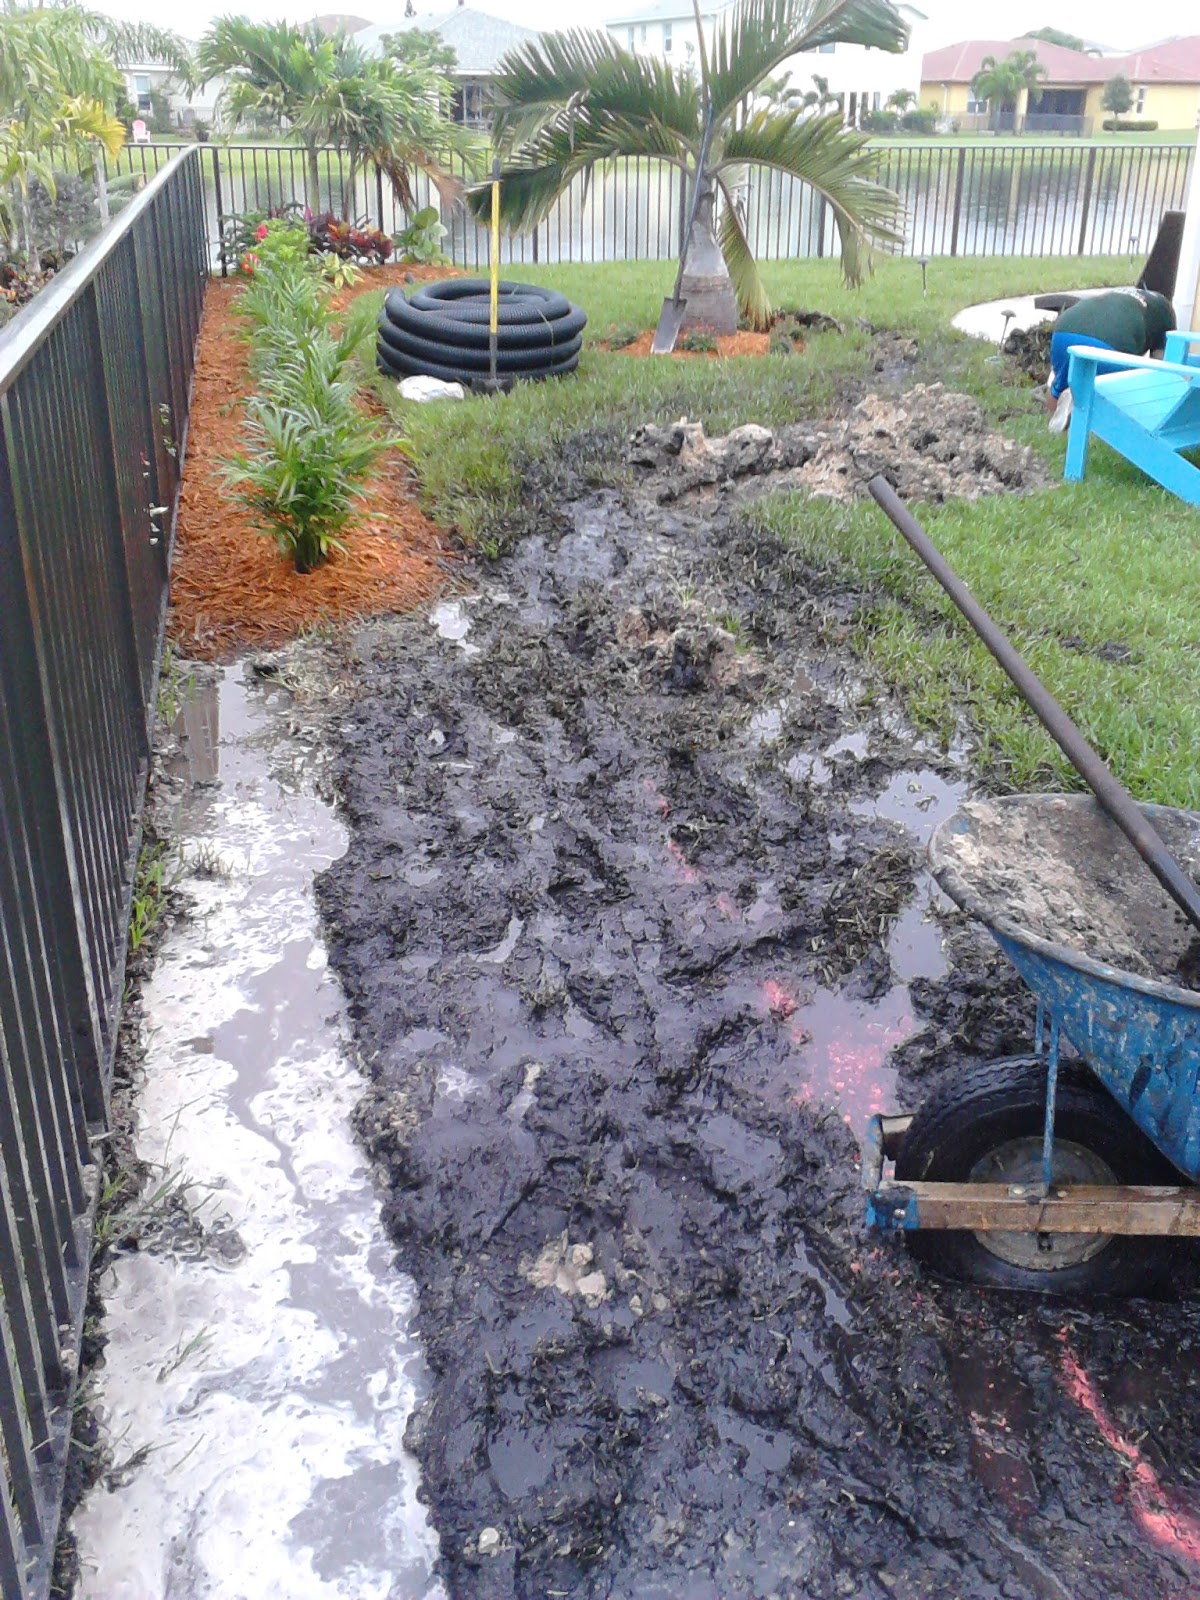
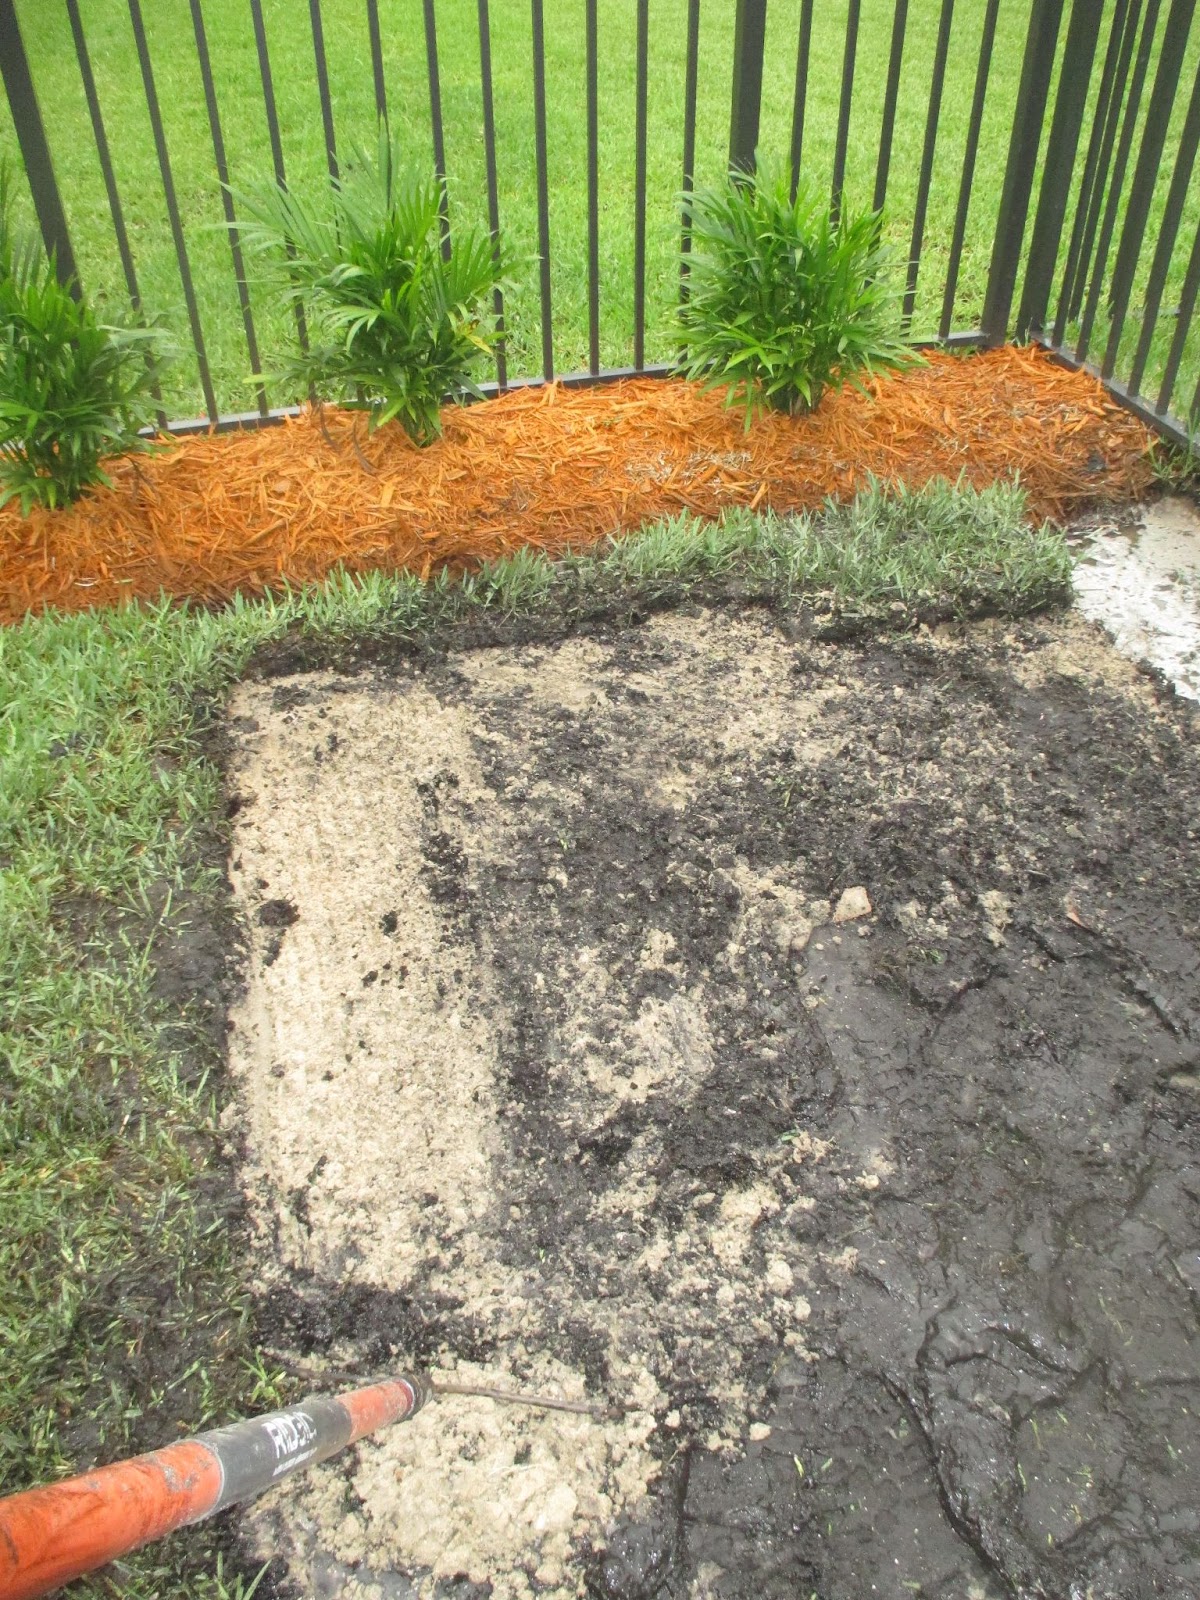
In the photo here with the backyard landscape and the planting bed is in the middle of the yard, the soil in this property did not drain well enough. To install the plants at grade level would have had the roots struggle longer with damp ground. In this example, we raised to soil level on average between 6 inches at the outer part of the raised bed to approximately 10” – 12” in the middle of the small bed area. This helped to keep the roots above the regular property grade, keep them dryer than in that regular dense, marl & clay soil and they could have stronger, established roots before being introduced and getting into that existing property soil. The roots had a ‘head start’ you might say, surrounded by fresh soils that were graded and brought in, both from other areas being dug out on this project and new topsoils that were added.
Depending on the size and layout of the planting area, its vicinity to a home wall or building, if we can raise up the entire bed area as desired to help elevate the entire planting bed, which to us, puffs up the ground. As in the photo here with the flagstone decorative wall with boulders inset, stone accents of different colors, this approach of elevating provides not only a healthier immediate soil base for the new, young roots that are going to be growing, but,
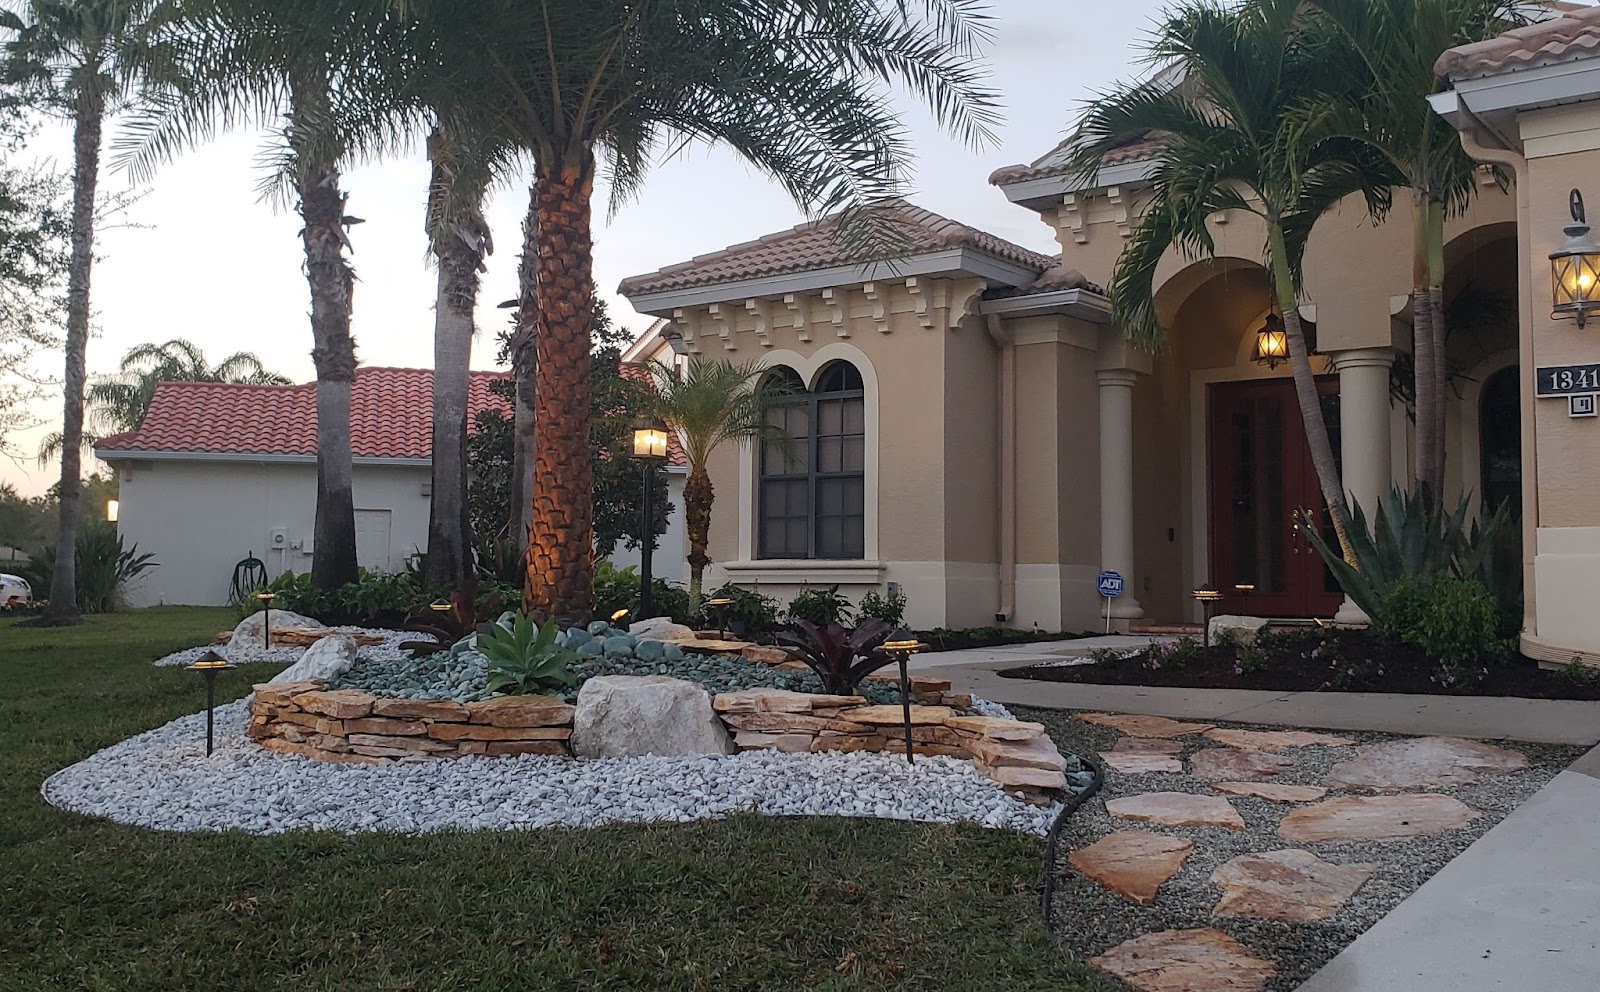
elevates and really helps the landscape stand out in ours and thankfully, many of our clients opinions. With an approach in hand rake grading, can even make ground stone border accents stand out even more as the ground is now tilted and not flat. Taking a negative a making a positive is some of the most interesting things we can do and becomes a unique twist in comparison to some neighboring properties sometimes.
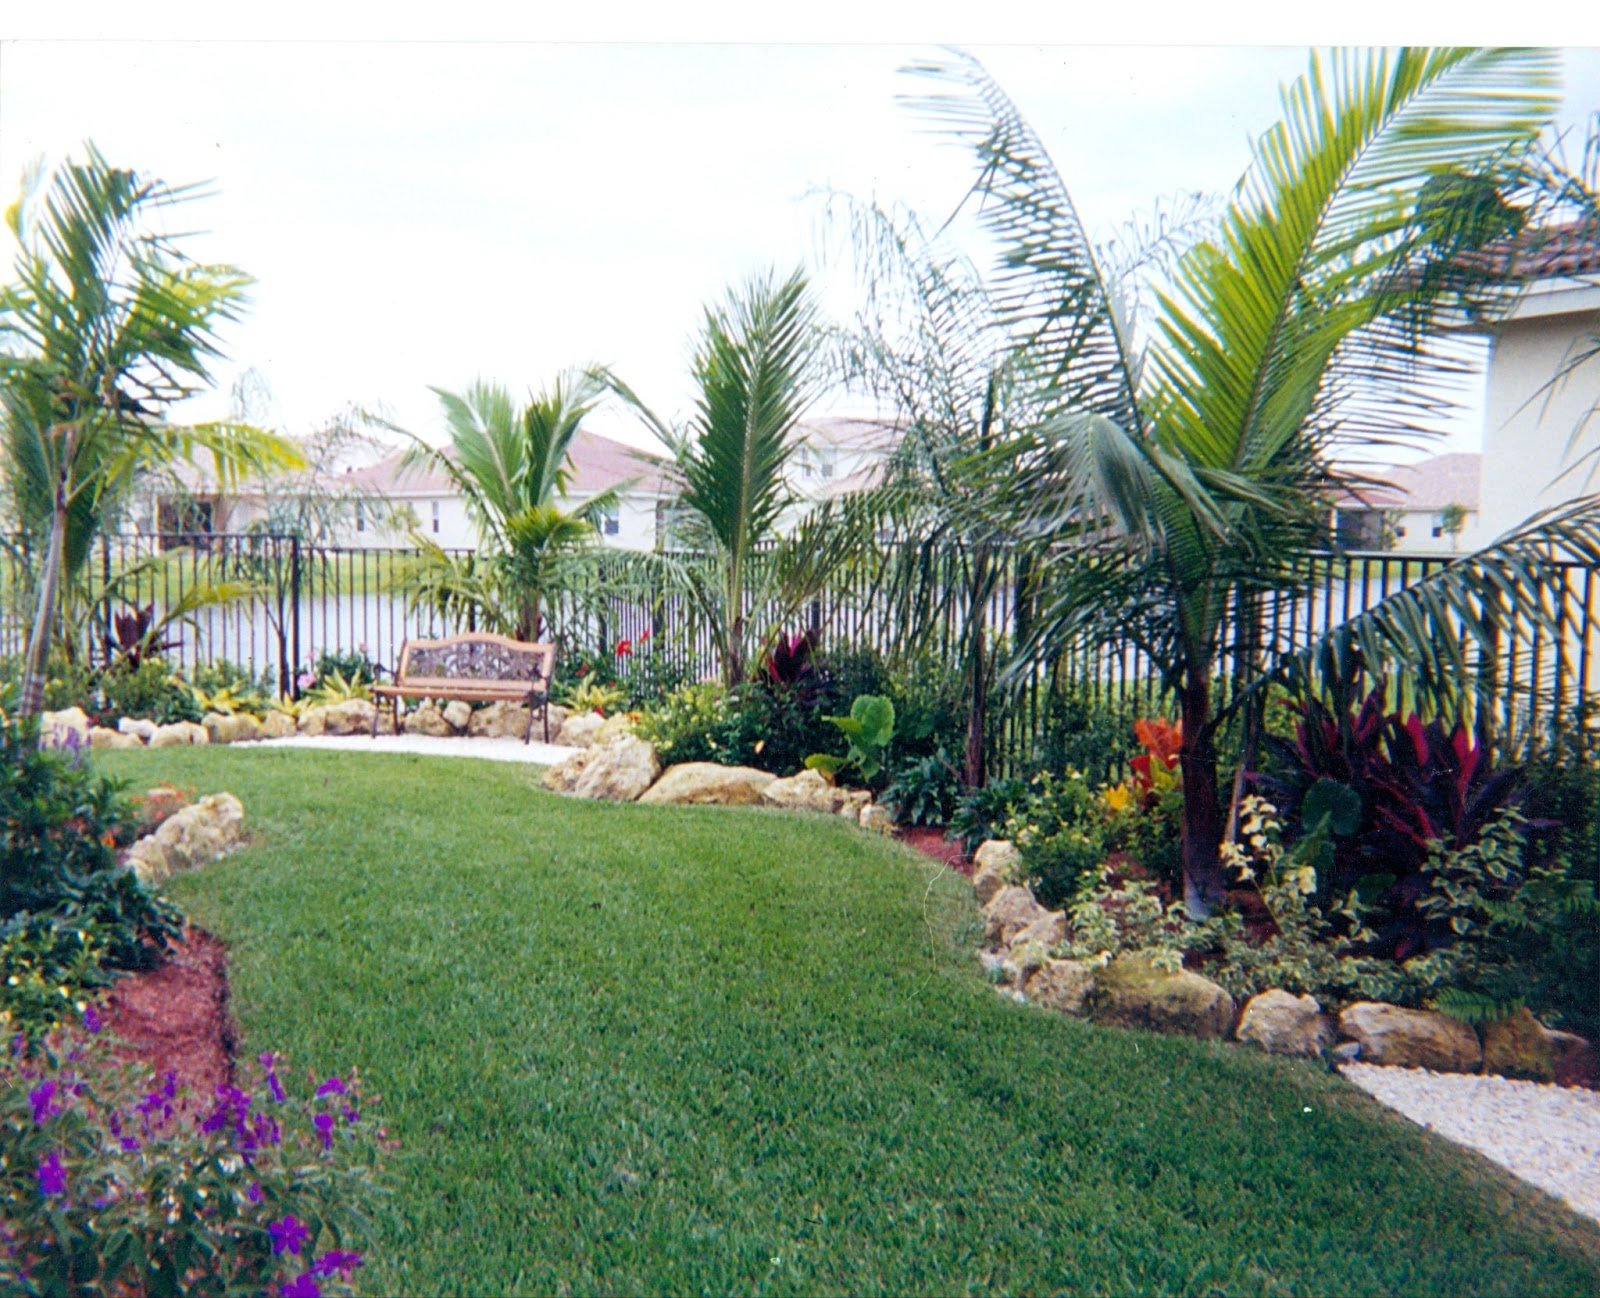
A landscape design with the elevated beds for those who like stone accents or a cleaner look included with any design. Using a border of stone (edging between the lawn and stone always) when the ground is pitched at a slope for an elevated bed, you can see the stone from further away and becomes a more visible part of the landscape. When the ground is flat, you have to walk or drive up closer to see it. Just a point again, how elevated beds can add not only a healthier means to plant in difficult or challenging soil conditions, but also make it more attractive of a landscape at the same time in our humble opinion.
Adding topsoil not only for drainage problems, but elevating grades as a healthy practice, all the time.
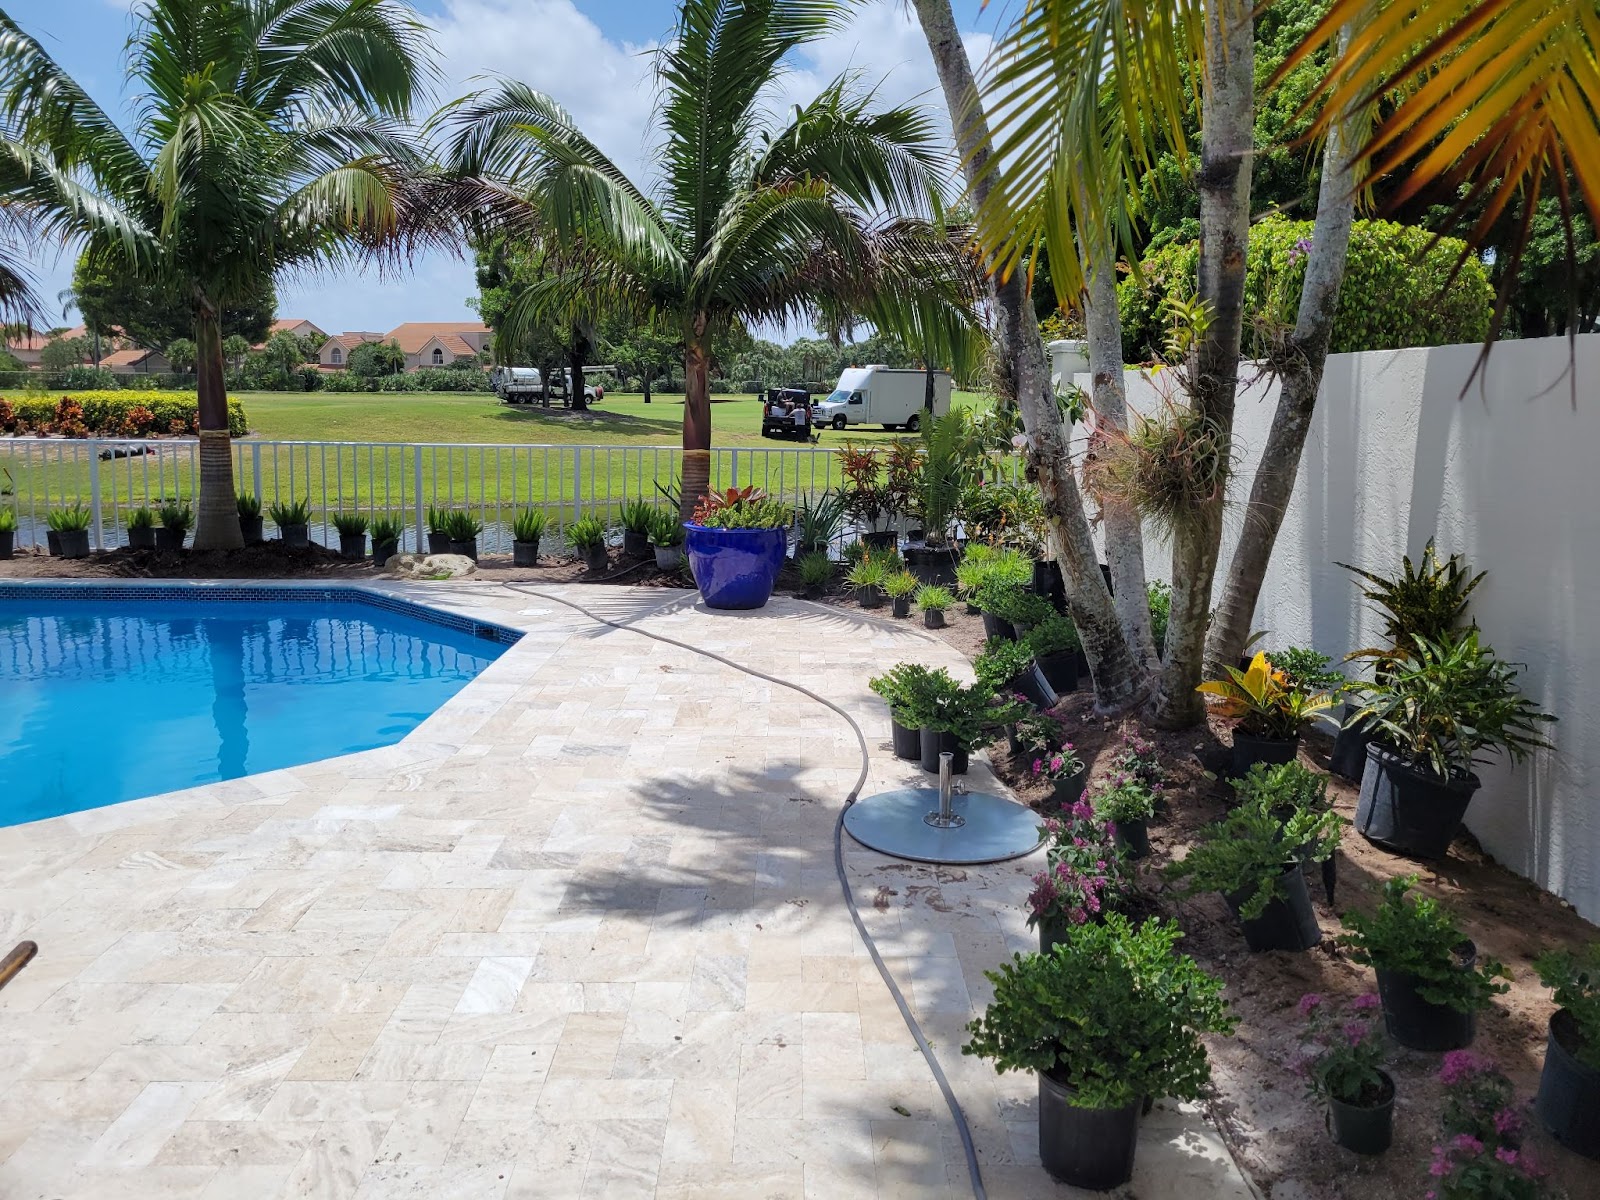
In the photo here, topsoils were brought in to help provide an elevation behind the boulders that were used to provide a point of interest accent that would stand out between the lawn and the bed area in this narrow side of house area that we made feel as their own tropical little courtyard area. Behind their pool in the back was only a few feet of space, not enough to have the feel of a yard or garden, so, we used this side area to create that feel and relaxing space for them. The soils were added, nothing extreme here, but fitting the look naturally, which simply adds nutrition to the new landscape to help give the new plants and trees an extra boost of a good start in their new home.
Stone as a surface cover to help clean up dingy areas and also help them dry.
In this photo with the Brown Tennessee flagstone step stones set in the Black Ground stone, framed with a Georgia Sunset small Flagstone retention border wall of about 7 foot length and about 12” – 14” inches tall at the peak, Brown River Rock helped to dress up this area that was a poorly draining area previously.
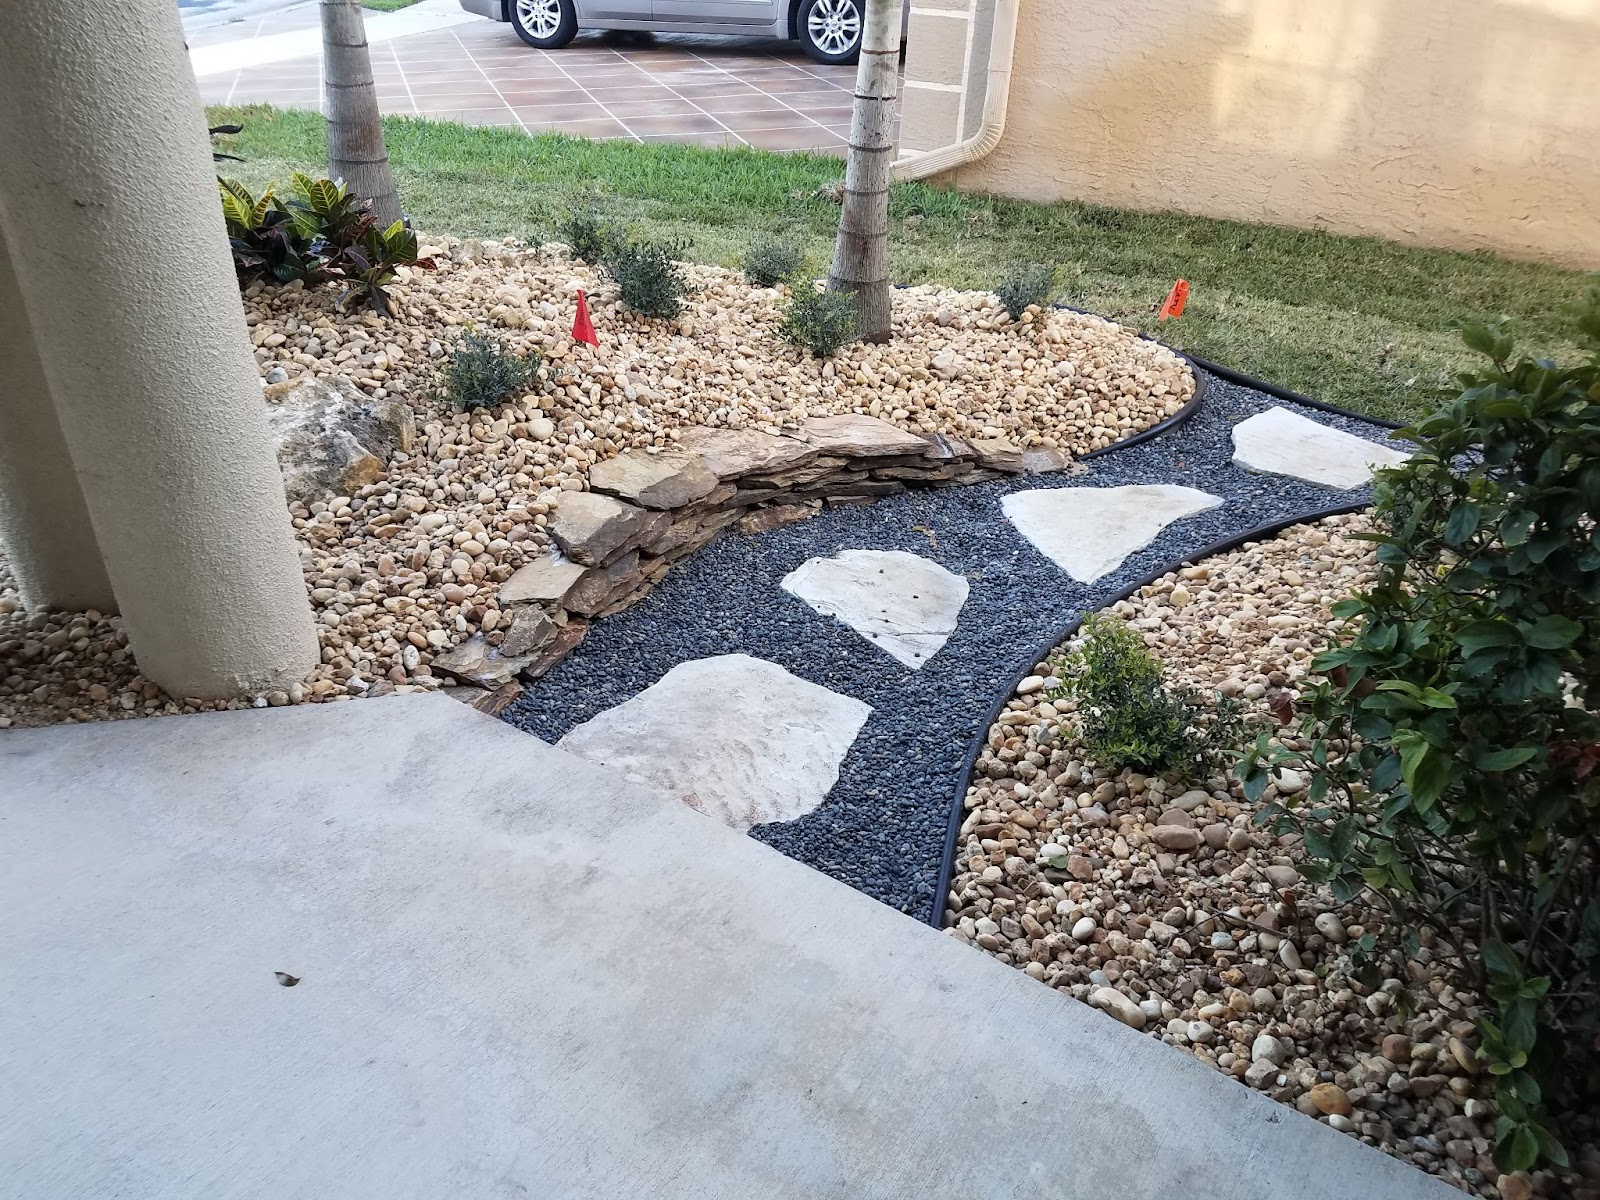
Nothing was growing too well previously. We removed the struggling plants, the homeowner wished for a cleaner look and the elevation we needed was kept in place by doing some flagstone border wall accents as you see one here. The contrast in stones helped it to pop and stand out. A simple layout for a highly visible porch area by this front door, offering a short path to lead to the side fence gate where a pool is in the backyard. An easy way for people to know where to step out through bed area and to the side fence to meet the homeowners by the pool in back. The beginning of this was an area that was dingy, plants not doing well, dying off, damp area. We elevated the area, used stone in its place and helped to clean it up. Hope some might like.
These aspects of these few examples, showing some commercial projects as well as small areas for some residential projects as well, all are dealing with both surface and ground water & soil conditions. Some we’ve shown the use of elevating planting beds simply as a way to puff up the ground, elevate the plantings, makes it stand out a bit more and provides a healthier base for the plants. Some, it was absolutely needed to be able to provide the root systems soil that would not be as dense and wet all the time.
//////////////////////
What to do if your property has drainage problems and you wish to have a beautiful landscape
We have provided some methods to help and the 3 basic scenarios people are facing typically with this poor draining soil condition verses your landscape :
1 ) The landscape is already existing
2) The landscape is going to be brand new with a brand new property and your planning ahead. (Think of adding drains to gutter downspouts and ways to pipe that water under and away any hardscape surfaces as well as adding collection drains to any planting beds in open patio areas)
3) The landscape is going to be new but will take renovating the current landscape
For all 3 of these situations the above tips on :
- Soil amendments
- Soil and planting elevating,
- Stone work, a method to help with dry out the ground a bit better than mulch. Won’t fix the problem of damp areas, but won’t foster mold or mildew growth as much as mulch which can retain more moisture than stones.
- French drains and drainage systems with gutters, these are 2 different methods to reduce the water in an area. The french drain, helping to dry out surface areas of ground.
- Drainage Systems with Gutters, a means to design and install a method to capture and collect water and to move it away from the home, building and landscape beds as well. If looking to design and install a drainage system, these should be thought to handle the heavier periods of rainfall, and the big storms. Design for that is our advice. For more information, we have more details on these types of systems on our site @
If you are facing problems with difficult soil conditions or have a landscape that is struggling with poor drainage on your property, these tips might prove helpful and give you some options to think of in your planning is our hope.
We hope you find this information helpful and it may prove of value to you.
Dampness of Ground issues verses Serious Flooding and Drainage Problems
On the surface, if water stands and collects, as noted with continually damp areas, mildew or mold growth on the surface can be present more easily and the problems that can occur from the presence of mold or mildew are expanding and not good. Not good for the home or building and not good for the landscape either. It can create damage to all it comes in contact with, including people who may have bad allergy problems and struggle when mold or mildew is present.
In this situation, this is the dense soil situation. In our own Palm Beach county, Florida area, more witnessed in the western communities, although we have seen examples in some eastern residences as well. The ground is not the same everywhere, even in the same neighborhood. The general composition of the soil might be the same, but some properties may have a more porous mix of sands and soils while others close by have a strain of more clay and marl with thicker soil in the ground.
Like veins running through the ground, are the same way lines of underground soils and stones may also thought to run, below grade. Hitting a ‘vein’ or ‘artery’ of stone or a type of soil, or a ‘pocket’ of something when digging is a description that might help hopefully to understand the nature of our soils, stones, minerals and our ground possibly.
If your property is flooding or is damp, a french drain (hole in the ground, lined with fabric that is filled with stone) unseen, below grade is a good way to help dry out a continually damp area. The french drain can help to provide a porous pocket for surface water to quickly escape into away from the surface, helpful for those properties that a simple irrigation system cycle or even a morning dew could contribute to muddiness.
To note : French drains are not solutions for rains and heavy water from rainstorms. French drains, like a bathtub, can be filled quickly and when full, can’t handle any more water until the water dissipates.
For storm water help, drainage systems are suggested. We have more in depth information on these systems on our own site, however, for a highlight, if you don’t have gutters on your home or building, this might be the first step.
After installing the gutters, evaluate your situation in regards to your property flooding and it is possible, this might help to rectify your problem with flooding in some areas by itself.
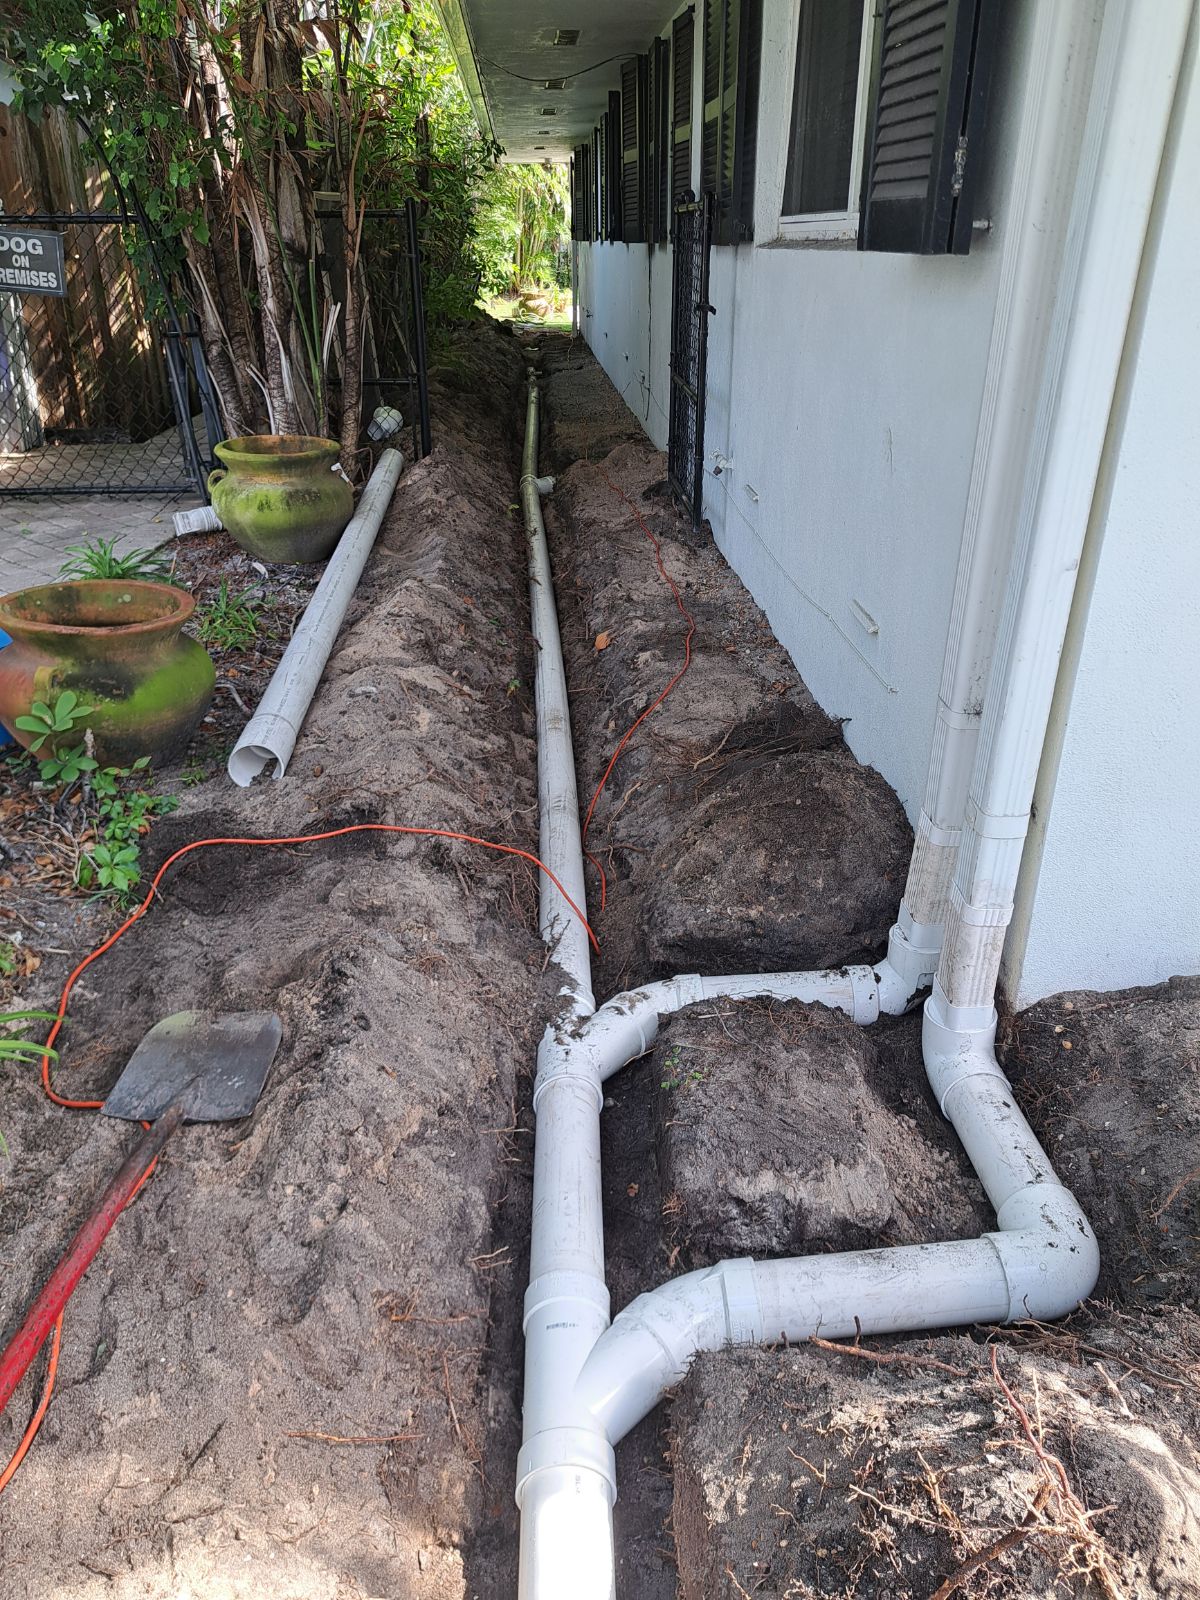
If not, if after the gutter installation there still is too much standing water that is on your property, a drainage system of piping, no less than 4” Pvc piping is suggested for a regular home. ( Larger homes and commercial building may require larger size piping. It is all about the volume of water and check with someone versed and experienced if dealing with a larger home or building)
Collecting the water from the downspouts and piping that water away from the home or building, preferably to the street so it can pick up with the neighborhood’s drainage plan for carrying that water away.
Warning : Do not use Black Corrugated Drainage piping for any areas running near hedges, bushes or trees if able.
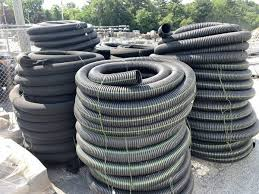
Black corrugated piping can work, but over time it is much weaker than 4” PVC drainage piping and we have found the Black corrugated piping can be more easily clogged than PVC by root systems from plants and more easily crushed by plant or tree root systems as well. Once a black corrugated pipe is crushed by roots, it will no longer be open and allow the passage of water as needed. In turn, a crushed pipe will not allow a drainage system to work properly.
For this point, we recommend only using PVC piping for drainage systems, similar to the way water to your home or building is carried with PVC piping for new construction, because of its integrity – when you want water to continually leave as well, best to use something that will hold its integrity over time.
So, for dense soil conditions where continual muddiness, or dampness of property is present, to the more extreme where flooding from rains threatens the property, addressing this problem is the first step on the path to a healthier yard and landscape for your property.
Ranging from the mild dampness with a french drain to a designed drainage system built to handle days or even weeks of heavy rain periods.
Dense Soil, elevating the planting areas with fresh topsoil and proper hand grading
If your property has drainage challenges, similar to what we’ve expressed, even if it doesn’t, the next tip should help any landscape to be more healthy and beautiful.
Adding in new topsoils is appreciated by any new plants or trees. Loose, highly nutrient soil mixes allows for easier root growth for new plants that are just starting out. Is it always necessary. No, its not, but the process of elevating the ground, whether re-shaping the existing soil at the property or adding new soil is a helpful one.
To not go too in depth here, when adding soils or elevating the soil levels anywhere near a home’s perimeter, typically in the front of the home or building, must be certain to :
- Not trap storm water against the home or building.
- Not to build up the soil high against the wall of the home or building.
1st point, if water gets trapped it can hold water for an extended period against the home or building and if a flaw is present in the wall or foundation, this can lead to a leak into the home or structure, which isn’t good.
Also, don’t want to have dampness by the foundation of any structure, as this can promote mold or mildew growth, which again, is not good, for many obvious reasons.
Secondly, if raising the level of the soil against the home or building’s walls, soils hold moisture naturally. The higher the soil against the outer wall, the higher the moisture level. Again, for the same reasons stated above, not good to trap moisture on a wall. Not all buildings and homes are built properly unfortunately.
Even the best neighborhood homes can possess flaws in construction, flaws in the foundation. They can exist for long periods of time without ever experiencing a problem, but the nature of ground conditions can change over time.
There are factors not only on one’s own property that can play a factor, but neighboring properties can influence a drainage challenge over time. We’ve seen couples living in homes for decades and never having any drainage problems whatsoever. Then suddenly increasing a drainage problem over the course of 3 to 4 years steadily as a new development was built behind their neighborhood some 7 years prior. That same couple needing to barricade their back sliding glass doors so water wouldn’t enter their home. Again, with some 30 years previous there with no drainage issues.
Neighboring conditions can affect your own property, the course that water runs on your own property can wear a path and change the conditions over time.
For all of these factors, we recommend, and simply as a good planting practice in any situation, that elevating the planting soil levels of bed areas, that allows rainwater to roll out and away from the planting area during and after a storm, helps not only provide and elevated soil of looser soil for the roots to more easily and quickly become better rooted, it also keeps the roots and ‘feet’ of the plants and trees drier as well.
An elevated planting bed also has a fuller look to it, a richer look if we might say in our humble opinion as well.
////////////////
Same Planting Bed Soil Elevations for Sandy, Porous Soils
This same technique of adding soils, either new or from the property is a technique we recommend for sandy soils that require a lot more water than average to help water in a new landscape.
The problem here isn’t drainage, as the loose soils quickly absorb even a hose left running on the ground in these situations sometimes. In this situation, adding new topsoils will help to retain a moister composition of soil that the plants will appreciate, as well as providing a possible needed boost of nutrients that the sandy soils might be missing.
The looks alone we think are a plus, with the elevated beds, while adding topsoil for bringing in nutrients to help promote root growth in the sandy, porous soils will most likely be quickly appreciated with a healthier start to any planting.
If your soil has a healthy brown or even dark brown, close to black look and it drains well, you are fortunate, like many in our area are with a good hearty soil base.
If your soil is sandy and drains extremely well but you’re struggling with plants health and the landscape is not performing, if you are maintaining, fertilizing, watering and trimming properly, insects and disease are not present, and this still is an issue with a struggling landscape; you might look at boosting the nutrition of your soil.
We hope that any in these situations may find the information here helpful and effective in fixing these kinds of soil problems.