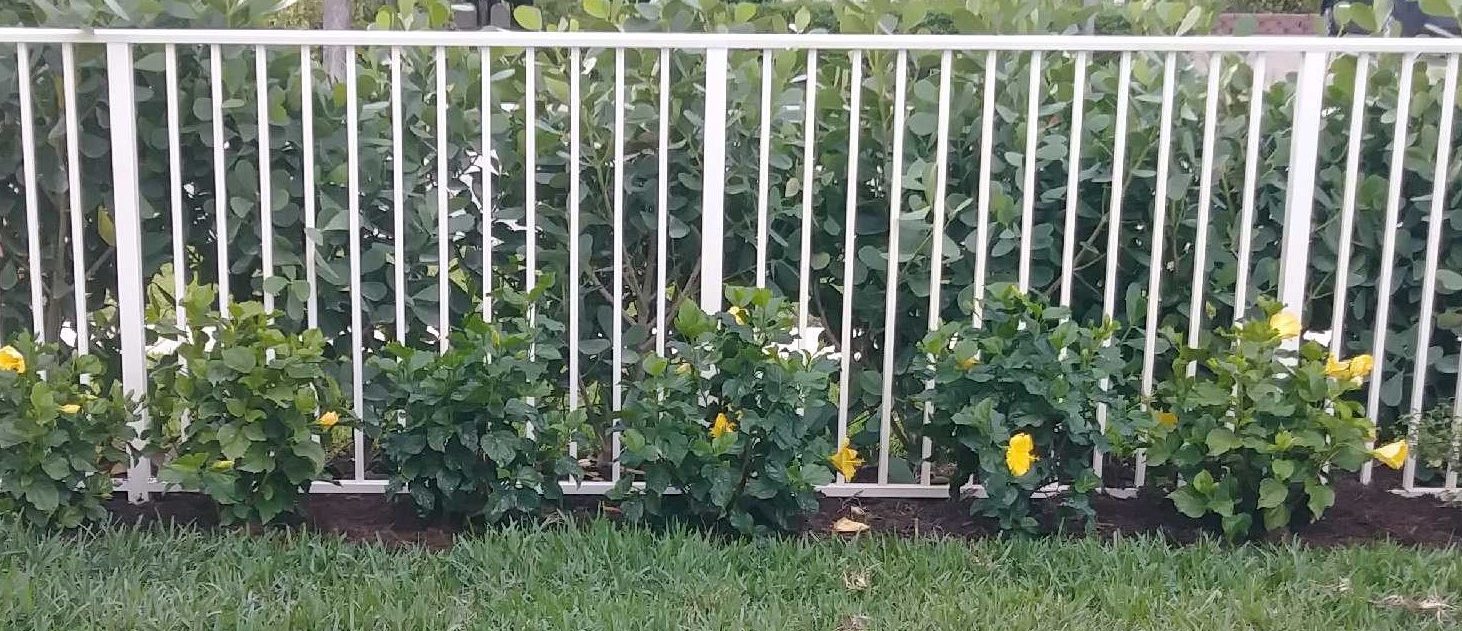
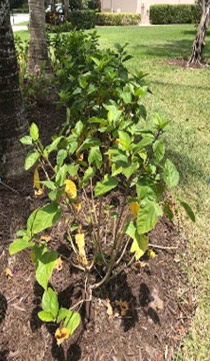
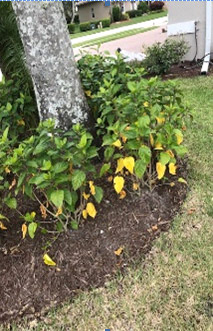
 Answer : Leaves turning yellow is a common sight when the leaves are ready to fall. First, they will turn a different color, usually brown or yellow and then drop. This is a normal process. This example of the Hibiscus bush in this photo is thin, but it is new having been in the ground for a few months and not yet established. Main note : not seeing anything but thin at this point or alarming, but good to keep track of. If it continues to drop more leaves and go more bare over following weeks, would be concerned.
We have provided notes to our customer we provide in this article and the following photos are those same Hibiscus plants about 5 months later after they followed our instructions. Note the fuller leaves and darker green of the leaves.
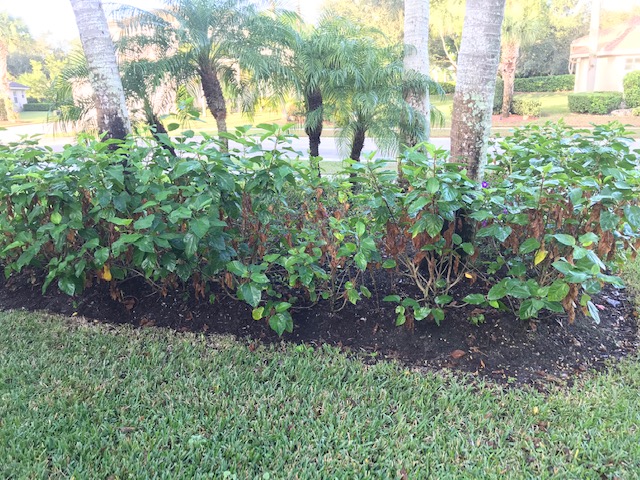 Same Hibiscus @ 3 months later
There is still stress in the Hibiscus with a good bit of yellowing as the plants get acclimated, but to note the bushes have more leaves and a darker green as they adjust and get rooted in their new home. This is not usually the case and some soils and yards take a bit longer than others for plants and trees to get acclimated and start to see a growth spurt.
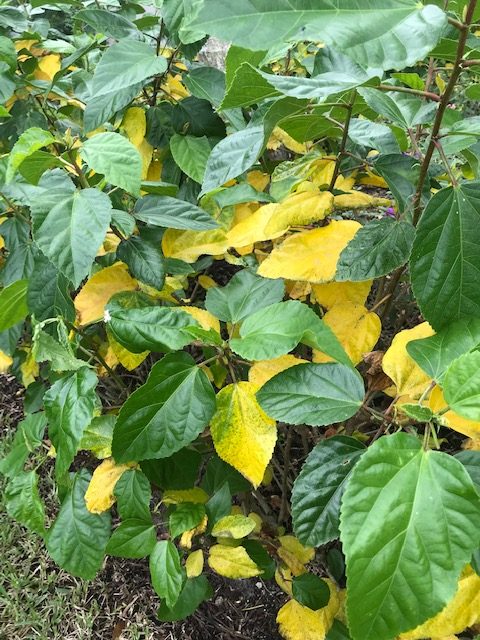
Same Hibiscus plants at 3 months later
Not all yards are the same and the soil conditions can have a drastic difference of affect on how quickly a landscape may get acclimated and start to show good growth in one neighborhood or property verses another.
Below, same Hibiscus after following our instructions, 4 months later. Note the leaves continue to thicken, yellowing is more in this 4 month photo but notably fuller bushes. Very notably, darker, richer green leaves.
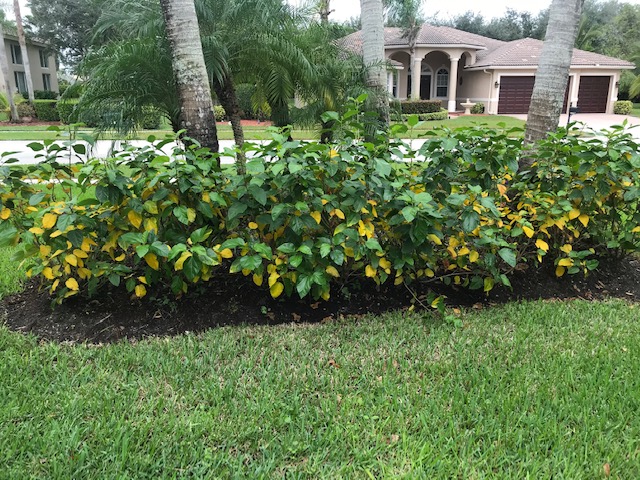
The progress worth noting is the thickening of these Hibiscus and we will talk about the challenges of this particular property’s neighborhood soils as well. It takes good root growth for the plants to begin to grow and after these 3 to 4 months, that has been accomplished with extra attention and care. We will detail the steps taken here shortly.
Same Hibiscus 4 months later.
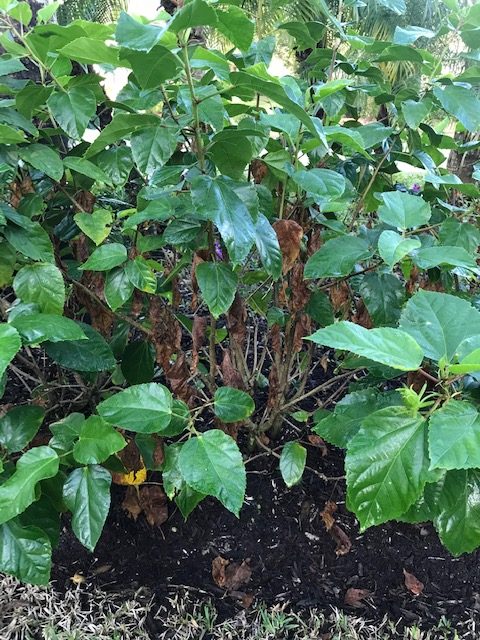
To note the example of these Hibiscus used, this residence is in Lake Worth, FL and the particular neighborhood has many properties with serious drainage issues.
We have performed drainage work for a different property on the same street and found dense soils, not very porous and not well draining. A property that doesn’t drain well can be a challenge at times for new landscapes to take root and start to show it good growth. That is beyond the need to make accomodations of making sure beds are slightly elevated and allow water to leave the planting bed. Even with all of these steps during installation, as in this case, some extra attention was needed during the first following year after installation.
Also to note : Overwatering after the 3 month introductory watering phase can also be counter productive. Sometimes it is easier to replace a plant, but in some situations, it isn’t. Better to help a healthy plant become stronger, and once through the tough phase of getting acclimated, will be further along with becoming established that introducing a new plant. One that makes it through the initial struggle at times and becomes healthy is more valuable than a new one in difficult yards sometimes.
Next Plant Example of this same property :
The next photo below is an example of a Dwarf Tibochina. To note, their leaves will turn red first as showing here, which is normal before falling.
At this point I would like to see them thicker, the amount of leaves that are yellowing are not concerning, but if that percentage increases dramatically, to like 25 % or so of the leaves, then that could be a sign of a problem.
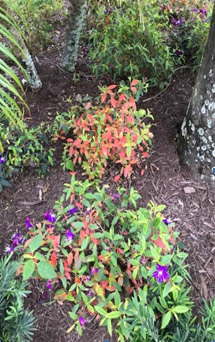 At this stage I am not seeing anything of concern over all. (after viewing all 3 photos) The one plant in the photo here with more red leaves may be in need of keeping an eye on. We have given our customer the tips below and wish to keep an eye on the one with more than 25% of red leaves in this photo. Possible need for replacement. It will either strengthen and adapt at the end of these first few months after installation, or could die off. Email photos from our customer’s such as this, help us to know if we need to come out, make adjustments, or replacements.
A few points I would check at this time :
1) Check the irrigation system to make sure that the sprinkler system is hitting the plants properly. A couple of things can throw off the sprinkler system such as :
a) dirt or silt getting in the lines and clogging heads.
b) damage to sprinkler heads or pipes getting cracked by maintenance work.
c) parts can go bad such as solenoids or valves, timers, etc. Best to do an irrigation system check every so often on the system as regular maintenance. We can recommend a company for this if you like.
2) If the irrigation system is working properly, the next thing I would check is how often and how long it is running per zone. I believe it has been a few months since we installed your landscape in January if I am correct? One point of concern is that the lawn is browning in the photo below, which could be a sign the irrigation is either not working properly in that area or not being turned on enough. (in the case of this installation the landscape was installed approx.. 3 ½ months prior) At this point, you are at the end of the first most important period of the ‘first few months’ after install.
 Should be watering every other day and ready to switch to 2 to 3 times a week at most. Long term once or twice a week at 45 minutes for your property (not all are the same with soil and drainage), should be good to help the roots chase the water into the ground and establish deeper (strong) root systems. We have not had much rain recently this spring, here and there, so may not be a bad idea to water a little heavier for those new landscape beds, an hour or so, a couple of times during the next couple of weeks if we don’t continue to get enough rain. One good rain is usually worth a lot more that turning on the irrigation.
3) At this point, I also would recommend fertilizing by the end of this coming month of May. Fertilizing 2 to 3 times a year will help the plants, trees & lawn for the first few years. More care when young will usually help for a longer, healthier maturity. Many landscapers have different opinions on fertilizers, personally, I’ve used 8 -10 – 10 for plants, trees & citrus & 13 – 3 – 13 for palms & bamboos for more than a generation with good results. Both of these can be purchased at Home Depot or Lowes, costing close to $50 for a 40 lb. bag. It is a granular and easy to apply. Best times of year to fertilize, we use these dates as reminders : February 2nd (Ground Hog’s day) , end of May (Memorial Day), beginning of September (Labor day) & end of November (Thanksgiving). 2 weeks roughly around these dates we’d suggest for good results. If you do these few tips, I believe you should see a thickening in the plantings.
4) Also, remember to trim. Don’t let the plants get too leggy. Trimming will help to keep the plants thicker and keep them that way as they grow in to their mature and desired height. If you need help with a clean up, mulching, trim or other, let us know, there are a number of customer’s who call us as needed or ask us to put them on a schedule for a little primping or cleaning up when needed. We don’t keep a regular maintenance schedule, but here when you need us.
5) For an extra boost of nutrition, a mild fertilizer such as a hose attachment set up of Miracle Grow that sprays the fertilizer through the watering attachment. It is a mild fertilizer and can be done daily up front, to once a twice a week long term. Follow the instructions on the product.
In this case, our customer did also follow this instruction of watering with Miracle Grow, along with checking off and following ALL OF THE NOTED STEPS, and the photos show the results and the timeline of the change in thickness of the Hibiscus.
Below is an example of newly installed # 3 Gallon Hibiscus with yellow blooms that are full and healthy. The above examples are thinner than desired a few months after installation and as we noted earlier, there are a number of reasons why this can happen.
