This is a loaded question, which can have a number of different answers depending on your goals, property size and any existing or possible new issues that could occur from changes to the property. While we can’t provide an exact price on any work here of course without exact details of a project, but we can give general ideas as far as budgeting. When it comes to the new design aspect of landscaping, people have very different tastes and goals very often, but we can still provide some general ideas of what to think about and some help with forecasting a budget.
We are going to start off with some common aspects of additional costs that can occur when building a new pool or patio at your home and then give you different scenarios depending on what your property size might be verses what you might be looking to achieve.
The largely ‘Unavoidable Extra Expenses’ of a new swimming pool being installed.
Irrigation
This work will be required for most any new pool construction. There are 2 phases a) Capping off irrigation before construction begins b) Re-connecting irrigation after the pool is built.
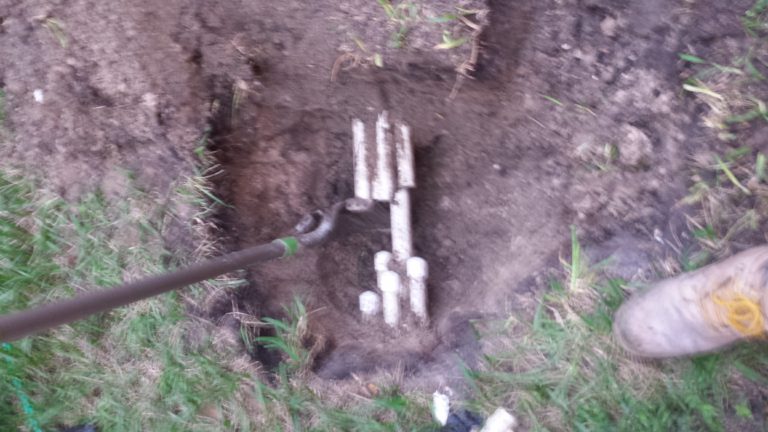
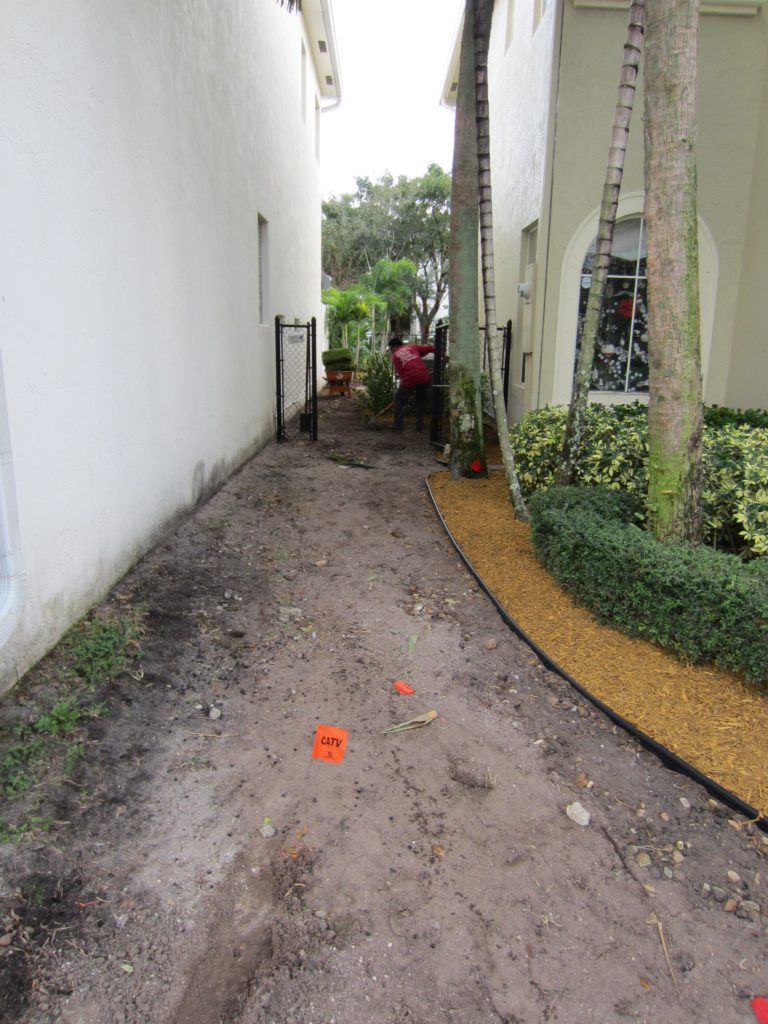
Capping off the irrigation to prep before the new pool is dug. The pipes of the irrigation are usually found on the sides of the house in the back corners of the home are to be dug up & capped which would cut off the irrigation system from watering any of the area of pool construction for the duration of the project. ‘Capping off’ is exactly as the words sound, a cap is put on the end of a cut pipe that leads to the backyard. With that cap securely attached, and the other old lines disconnected, this makes sure that water will not be running through the irrigation system during the construction process for the areas required and determined by which irrigation zones were ‘capped off’.
Capping off the irrigation is very important to have done for many reasons. During the excavation & work in building a new swimming pool, irrigation lines can and usually are broken throughout the yard where the construction takes place.
If irrigation lines are not capped off, these same lines, when often broken can cause significant damage to the new pool or the home during construction at times, or even if not recognized, can cause problems after the construction is completed when everything looks finished and done.
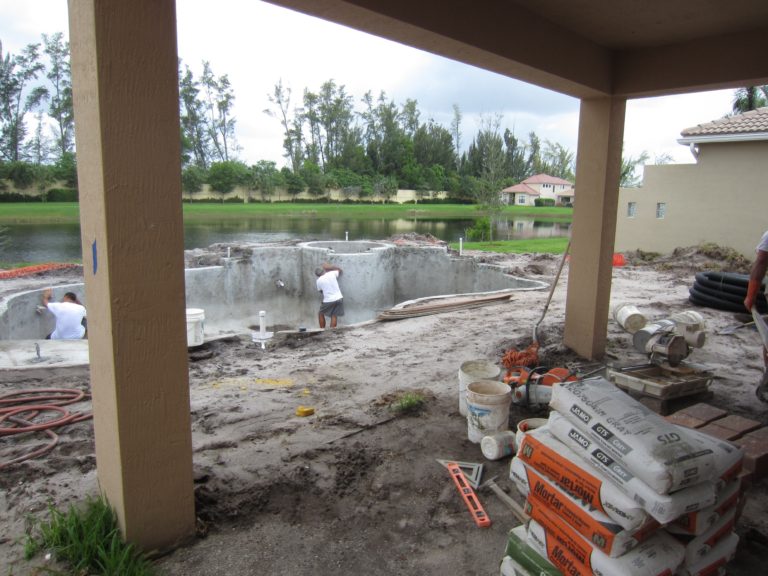
Damage to pool construction can occur as the photos below show in this extreme case here, as the irrigation lines were not capped off and the irrigation was kept running for weeks. The erosion would continue for weeks until it got to the point in this case that it was close to threatening the foundation of the house.

Again, this is an extreme case that could have been rectified as soon as the leak was detected by – Shutting off the irrigation system until the irrigation piping going into the backyard was capped off.
As we came in the end of this project and were not involved in the pool construction, we met the homeowner towards the end of the project, well past this initial dig stage in this case. The homeowner provided these photos as they may be of use to others to help educate in becoming more aware of potential problems. They also noted that the pool builder left the situation for weeks, which frustrated the homeowners as well as took a chance with potential damages to the home which could have been easily avoided. The cost of capping off the irrigation by a professional is typically between $175 to $250.
Another possibility of damage from uncapped irrigation lines can occur after the pool is completed. If an irrigation line is capped off and re-connected after the pool is finished, it is possible that a small break can occur in the old line and when re-connected, after the pool is finished, which can cause washout at that time. This kind of damage can be seen most notably by sinking pavers or cracks in the concrete deck after the pool is complete.
RE – Connecting the irrigation system with new piping through the backyard after the pool (or patio) is installed
The reason for installing new irrigation lines after the pool construction is as last mentioned above; if you re-connect the previously existing lines, there could be damage below ground that you are unaware of. If those old lines were running under your new decking this can cause a couple of problems from resulting washout.
A washout cavity could occur below the new deck caused by an underground crack in the pre-existing irrigation lines to cause cracks or settlement problems in the new deck. That same washout could possibly could also create an underground cavity from washout that could cause a problem with the pool.
These 2 reasons for potential damage after construction are why we would always recommend new irrigation piping to be installed after the pool is complete. (Not to mention the old irrigation lines are most always damaged beyond repair, no matter you’re pool builder.)
“So, what should I budget in regards to irrigation for the pool project ?”
Another loaded question and this will vary directly on 1) The size of your property and area that needs re-connecting 2) The difficulty of the soil or obstacles that could make the work more time consuming.
On average xero lot line homes are less expensive simply because they are smaller. ( In regards to working within HOA community irrigation systems, please visit our article regarding questions associated with living within HOA’s. ) {HOA = Homeowner Association}
Here are a few expectations for your irrigation budget for the re-connection after pool construction:
Xero lot line properties will range from $1,400 to $2,300 typically. Most other properties, just for the area behind the new pool area, is usually all that is needed. Most properties will range from $1,500 to $3,500 typically.
These are by no means fixed prices but an idea of charges for this phase of work to be performed by a licensed and insured irrigation contractor. We are not irrigation contractors but we do work with them.
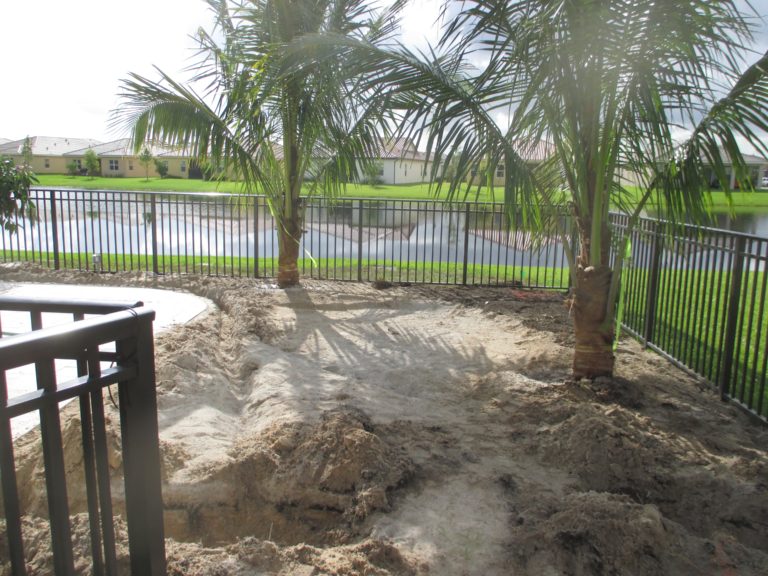
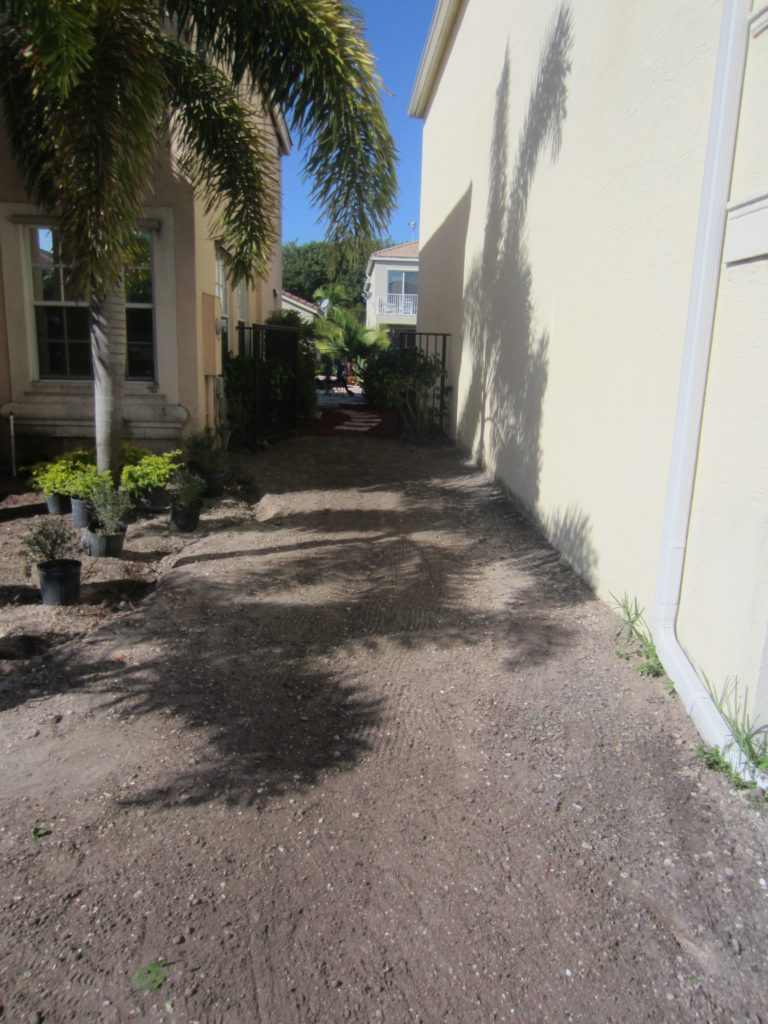
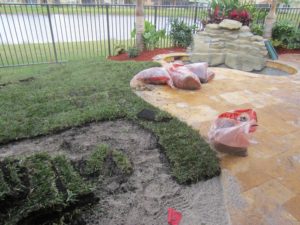
Installing new Sod after the new Pool is completed
This is often the view after a new pool has been installed, in this case for a xero lot line property.
What’s needed : 1) Make sure the grade is performed properly so that the water leaves an area naturally following the grade of the property.
Many might think, ‘we can just throw sod down’, and it can be a mistake. Can’t stress enough the importance of removing any debris on the ground and performing a smooth grade of the area, first for drainage purposes, 2nd for a smooth lawn without low spots or uneven areas that can cause a problem walking on later.
“How much sod might we need if we have a xero lot line property ?”
The answer is generally between 2 to 4 pallets. Property sizes differ, also the amount of damage can vary as well depending on soil, dampness conditions of the property as well as how much damage is done by the operator of the excavation machines.
The cost will also depend on how much re-grading is needed to repair the grade conditions as well as accounting for any drainage problems if they exist. So, the cost isn’t just the price of the sod, but the amount of labor to prep the area as well.
For those not looking to landscape and just wanting to repair the area after pool construction, figure on your irrigation replacement costs plus a minimum of 2 pallets of sod. Installing sod is simple enough, but it’s the prep work and how cleanly and neatly that it’s installed that makes a difference in the job.
Here’s a mistake that’s made when the sod isn’t installed properly or the grade level of the property wasn’t accounted for, A SIMPLE TEST.
When you clean off your pool or patio deck, or any hard flooring surface outdoors with a hose, you want the water to roll off of the deck and into the lawn. You don’t want the water to hit a wall of grass and then come back onto the deck & bringing dirt with it.
If you’re lawn isn’t installed by the sides of your patio or pool deck low enough to have the water wash off a deck, during rains, the water from the rain will also run onto your deck more as well. ALSO MAKES IT HARDER TO HAVE A CLEAN DECK AREA.

Note : If you’re having landscaping installed; trees, plants, palms, etc. the cost to prep the areas for the landscape will help to absorb the cost of prepping for new sod installation as the grade will (should always) be accounted for when renovating the landscape for a construction area.
In regards to sod costs, as there are different varieties of sod / lawns that can be installed, some cost more than others.
Least expensive: Bahai, which is not really a nice residential lawn in our opinion and is often referred as a ‘cow field grass’. One reason it’s called this is because it is often found there. This lawn does not grow thick but is very durable, can live without irrigation, can go neglected and survive more than the others.
Floritam: The most common lawn in Florida. Durable, holds up well to the heat and rains. Blades are less soft than northern lawns.
Palmetto: A good lawn for heavier shade areas. A little more costly than Floritam.
Higher priced lawns: Bermuda, Zoysia, Empire, Celebration. These lawns are also higher in maintenance and more temperamental typically.
There are a number of factors which can make a good, new lawn go bad quickly or later on after installation. First things to remember, water in for at least 2 to 3 hours the day of the installation and stay on top with watering for the first 2 weeks especially. Fertilize 2 to 3 times A Year the first couple of years.
Many conditions can affect even the best prepped lawn , main factors that hurt lawns are 1) Poor drainage 2) Improper watering (too much or not enough). 3) Lack of nutrition 4) Heavy shade with trees that drop leaves and suffocate the lawn. 5) Heavy foot traffic areas
For more information on lawns feel free to visit the article on our site referring to new lawn installations here.
“I live in an average sized lot development, 10 to 30 feet or more from the sides of our home to the property line. How much will the sod installation cost me after the pool is built?”
The length of the driveway and, or how far the new pool is away from the street will determine how much sod can be damaged during construction.
For most properties you can figure for 4 to 6 pallets of sod will need to be replaced after construction. If you figure on the high side at 6 to 8 pallets, most often you will be adequately covered for sod replacement for many typical new pool installations.
If the pool builders or other contractors are working on other projects such as new waterfalls, outdoor kitchens, gazebos, cabana baths, etc. and are using ‘staging areas’ for storing materials during the project and using more machinery than just required for the pool construction, the amount of damage can increase of course. This would increase your need for more sod.
Now, if you’re installing a pool that is much larger than normal, the larger the deck can help with reducing sod costs, but everything is relative.
The average square footage of a pallet of Floritam sod is 500 square feet approximately.
A tip on how to SAVE MONEY & cut down on the cost of how much sod you’ll have to replace after the pool is built!
Below are 3 examples of homes that are having pools constructed, one is going to require a lot less sod than the other 2.
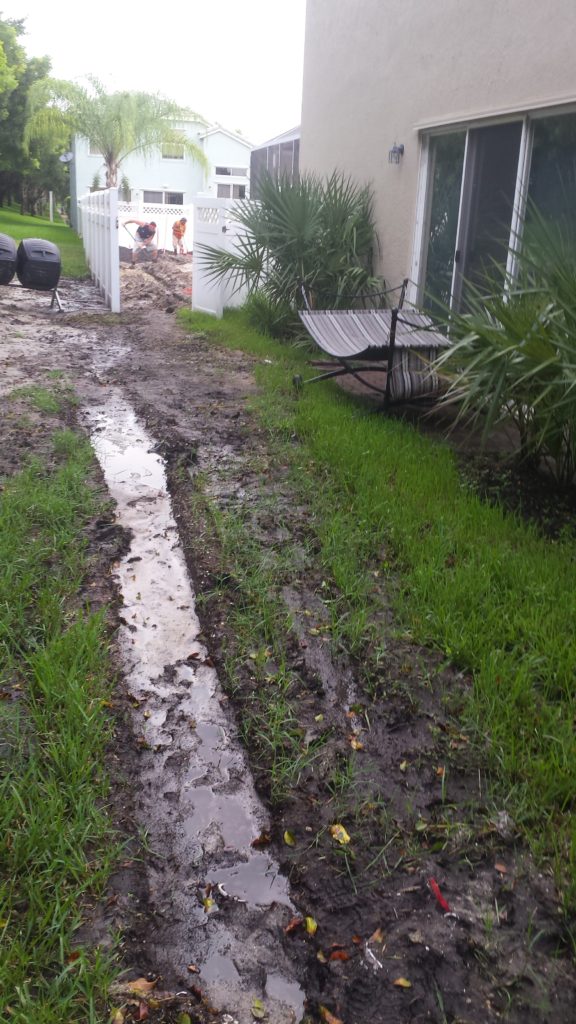
Heavy machinery & foot traffic by workers during construction are what destroy lawns more than anything else during pool construction. The more damp or wet an area, as in the photo here, the more machines will sink into the ground as they move back and forth. This also increases the labor cost as it is necessary to repair the grade after the construction is complete, the drier the lawn and ground right before and during construction, the more firm it will be.
MONEY SAVING TIP: Shut off your irrigation about 3 weeks before construction is to begin for the areas where the work traffic will be.
With a drier property for work traffic, this can help at times to drastically reduce the amount of damage and sod required for repair.
Also to note, some properties have such poor pre-existing drainage conditions that this tip won’t apply as much to helping dry out the area but can still help. Even so, with normal conditions with landscapes that have been established for at least 6 months to a year, once to twice a week watering for 45 to 60 minutes will usually be adequate for the great majority of mature landscapes & lawns. (Read our Xeriscaping Articles for tips on establishing the strongest, most resilient landscapes, and it is largely due to how you water (often people overdo it.) https://universallandscapefl.com/xeroscape
DRAINAGE ISSUES
Dealing with existing or new drainage issues caused by changes to the property by new pool or patio construction
We’d like to start off with an important tip: MAKE SURE you’re property is at the proper grade following the pool construction BEFORE THE IRRIGATION IS INSTALLED!
Another tip: If you have pre-existing drainage issues at your home and you’re looking to have a new pool installed, if possible deal with the drainage issues at that same time as that may be the least expensive opportunity to do so.
Thankfully, not everyone has drainage problems. For those that do in regards to new pool construction, there’s only 2 ways by common sense that drainage is an issue. 1 the problem existed before the pool was built.
The new drainage issue has resulted because of the new pool.
The grade levels can require adjusting for a new pool and deck depending upon how the home is sitting on the property and the pre-existing sloping away from the home.
Some backyards can be land locked with neighboring properties which sit higher and create a problem not allowing adequate runoff. This is especially a problem when the property isn’t graded so that the water has a chance to escape away from the home’s foundation and off the property to designated easements at the rear, sides or front of a home.
The best time to install new drainage during pool construction
The most cost effective time to deal with drainage if possible, usually is while the new pool is being built. The reason is that the property is already being disturbed in a major way and it is much easier to install drainage as the grading work is being re-done.
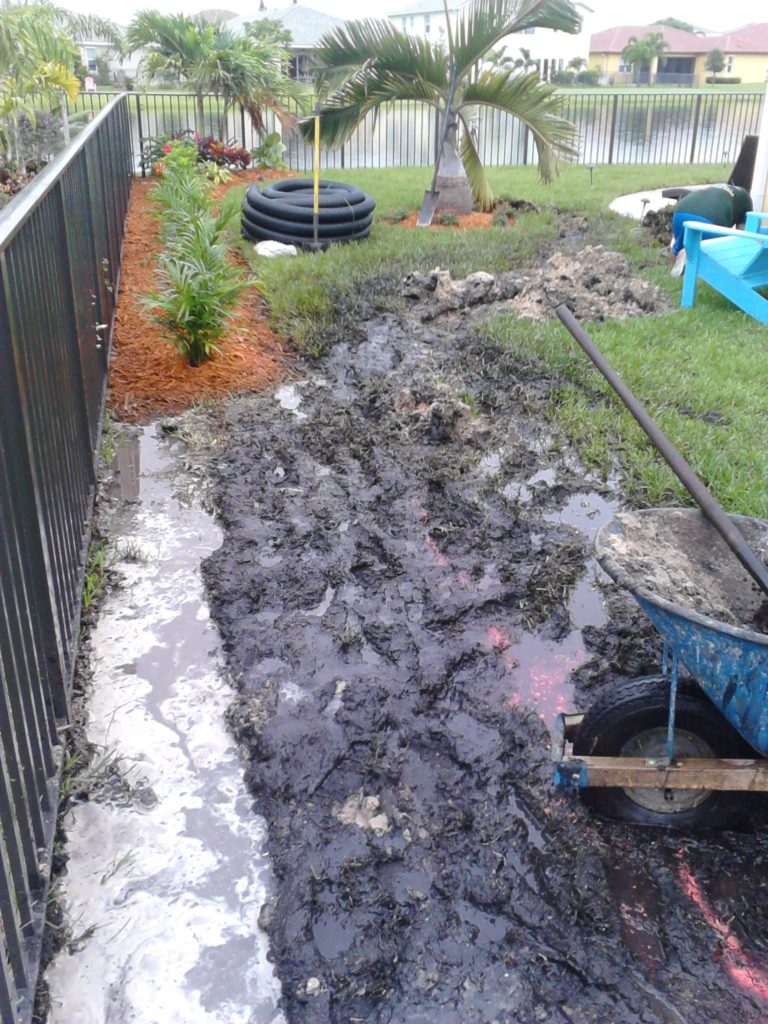
If you’re backyard looks anything like this photo here, this is the best time to install your drainage work. The shell of the pool has been shot with gunite. The plumbing inspection has passed so the open trenches around the pool are filled back in and the pool builder has removed all the excess soil that is not needed. At this point a rough grade by the pool builder has been performed ahead of the pool patio decking to be installed.
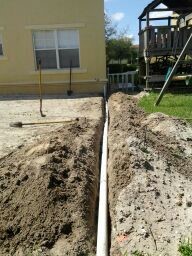
This is the time to tap into any existing gutter downspouts off of the back of the house and pipe them under or around the new decking dimensions as required. After the deck is installed you will not have this same opportunity as the deck will have to be lifted and removed in sections to gain the same access. Tip : Use PVC (at least 4”) piping below decking, less likely to bend or get crushed below decks than Black Corrugated Drainage (4”) piping.
“If I don’t have drainage issues now, how can I be sure I won’t have them later after the pool is done ?”
There is no way to give one answer here for everyone to this question.
There are things however you can look out for to provide some insight to this question. If your property, before the pool, sits with a higher elevation than the sides, back and front of your property, this is a positive slope and a welcome sign. Positive slope is where the slope goes down and away from your home, the house sitting higher. A negative slope is where the yard is higher in sections than the foundation of your home. This is bad and if you are experiencing this, the water will roll towards the house during rains rather than away as it should.
If you have a strong positive slope and if the foundation level is extended for the dimension of the new pool area and the water will still roll downward from your new projected pool patio, this is a good, healthy indication you won’t have a drainage issue.
Sometimes, the problem can be, not so much with the new deck that is installed, as it has to coordinate with the leveling of the home, unless a unique design; but we would suggest attention for those with a property that doesn’t drain well to start off with.
The 2 photos here show both a problem and a solution for many properties.
New problems with drainage can occur more with properties that don’t drain well to begin with, especially smaller properties or those with poor grading throughout the development where water doesn’t leave a property to the easements and away from the area good to begin with.
One reason, when looking at the total square footage of the property, the house can take up the majority of that land space itself, especially with smaller lots. There isn’t much room for the water to be absorbed naturally into the land and with poor draining soils, the expansion of a hardscaped, non-draining surface, reduces the available land space further.
To put it another way, after the pool is built, there is even less land available for natural drainage into the soil. There is more water going into less available draining space.
Solution, especially for smaller lot properties with drainage issues is to tie into the gutter systems that collect the roof water of the home and dispense of them through the gutters. If you don’t have gutters already and this problem arises, your first thought may well be to get new gutters which can help concentrate the water into an area, and can help with drainage tremendously.
As the photo with the yellow home shows, by taking the concentrated flow of water from the gutter downspout and piping it into underground drainage piping, this leads away all the roof water collected in that area from the house. The piping then leads the water to the the property’s natural water easements. By doing this you are effectively working to take that significant amount of square footage of roof water from the home, out of the equation. THIS IS ONE STEP IN DRAINAGE WORK WHICH CAN BE VERY EFFECTIVE AND HELP TO RESOLVE MANY HOMEOWNERS ISSUES.
For those still needing more drainage work, as the one photo shows a lot of water in the side of the yard by the pool by the side property line, having neighbor’s with higher properties can also make a problem worse.
Our sentiment is not to give your problems to your neighbors by raising your property higher than theirs. Some will work together, often we suggest containing the problem on one’s own land and creating a small burm to help eliminate the neighbor’s water flowing onto your own yard at the same time. Then this water is directed towards the front or rear of the property, often tying in with underground drainage piping and collection point drains to help remove the water from the property.
Each individual property may have its own drainage issues, but 2 tips we feel are important to note no matter your property :
1) It is typically less expensive to deal with drainage issues while the property is still torn up from the pool construction than at any other time.
2) Make sure the grading is correct BEFORE the irrigation lines are installed.
We began with this point about having the grading correct before the irrigation is installed and we will close this section with it here.
Once the irrigation is installed, the level of grade is pretty much accepted as finished. If the land is higher than the new pool deck surrounding the border of the pool area, you can pretty much count that the water will not drain away from the pool area. With a higher surrounding area the water will become trapped. If you add roof water into this equation that also doesn’t have a way to get away from the foundation of the home, the situation with holding water is worse.
Some properties are blessed with great draining soils and these points hardly present an issue, even during the worst rain periods or heavy storms. Many others, even an afternoon shower will last and be retained where during normal weather, mold and mildew can build up in the yard and even on the side walls of the home.
We’ve seen people have mold and mildew cases inside of homes, even ripping up and replacing flooring through large sections of a house with these issues. It is not that often, but enough for us to make those who know they have drainage issues, make an extra note here.
So, if you’re property isn’t draining well before the pool is built, take that time an care to take a good look at the pitch of the property before the irrigation is in, the sod installed and the project complete. Something we naturally do, but a word that hopefully will benefit even those we don’t work for.
HOW MUCH DOES DRAINAGE WORK COST?
There’s no way we can provide a price to everyone who might be dealing with this here, but if some drainage is added in from the back of a xero lot line property, from the back wall to the property line water easement for some typical xero lot line properties – the prices can range from $650 to $1,200 typically. It just depends on the size of the area and the situation.
To again provide a general idea as to the cost to have drainage collected from the gutters on the sides of the house and running underground drainage piping (PVC) to the front or back property lines for neighborhood water easements, with in-line drains for collection points; the pricing could vary anywhere from $4,800 to $5,400 per side of the house. Again depending on the situation and these are by no means fixed prices, but a general budgeting aid effort.
Each property is usually unique in some way, but there are similar problems and solutions often. When putting together a drainage plan, we are firm believers in the sense that if you are taking a minimal, less expensive approach to solving the problem, step by step, that is great and even recommended in many cases. But the thing to note is that each suggested step should be working to improve a system, not that one part of work would become obsolete if an increased step was required. Every bit of work should go towards improving a system, with each new stage or step of work (if this is the approach), leads to help improve the situation and to solving the problem.
When in doubt, speak with several different experienced contractors who do this work, civil engineers who work with residential clients as well as commercial, or even a trip to visit the on-call engineers who work in your city or county building department. Research and more opinions won’t hurt.
At the end of the day, there’s generally 2 ways that water leaves an area where the soil doesn’t drain well. 1 is by gravity, the slope of the grade that leads water to and from or traps it.
The 2nd is pressure. This pressure can be supplied to push water by a sub-pump as with many northern properties, or even the head pressure that builds as rainwater falls with force downwards from gravity through a gutter downspout.
Taking this head pressure from the gutter downspout and tying it into an underground drainage system, adds force to the water and moves it through the pipe, which is an advantage to any underground drainage piping system.
We hope this information may be found helpful for any that are dealing with this issue and providing some food for thought beforehand if considering and getting ready to build that new pool !