Drainage Quote Request: Information to Submit for Free Drainage Assessment

We charge between $150 to $250 to come out to assess the drainage problems of a residential property in Palm Beach County, Florida. Commercial property inspections can also be in this range and at greater cost, depending upon the size and location of the property.
This Inspection we provide is only as a means to help us examine and evaluate the conditions of a property and the drainage problem a property is experiencing. There is no written report we provide as part of this visual inspection, it is for our own information gathering to help us determine a drainage solution. We can provide an opinion on the conditions of the property we see and possible causes as well as a suggested solution, after the inspection upon request.
We prefer to provide FREE Rough Estimates than coming to a property and charging for an inspection. Again, the inspections are to verify conditions for our estimates for drainage problem solutions.
How to get a FREE Drainage – Rough Estimate from Us without an initial inspection:
To Note: After we provide an Estimate by email, with your interest, we would require a meeting to inspect the property in person and to assess the conditions before we can confirm the Drainage quote provided. We also can provide a required diagram for your HOA and all required documentation and certificates required by an HOA. At the end of that meeting to evaluate or confirm / adjust the quote at the property, if we are not contracted at that time, there would only be a charge for the inspection fee at that time.
Required information to be emailed to us at: office@universallandscapefl.com
Photos of the property requested:
- Photos & Videos taken during a rainstorm are most helpful when able.
Please Note: holding phone sideways for wide view photos is more helpful for us to view
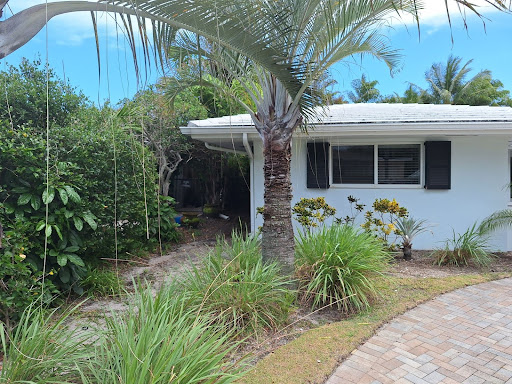
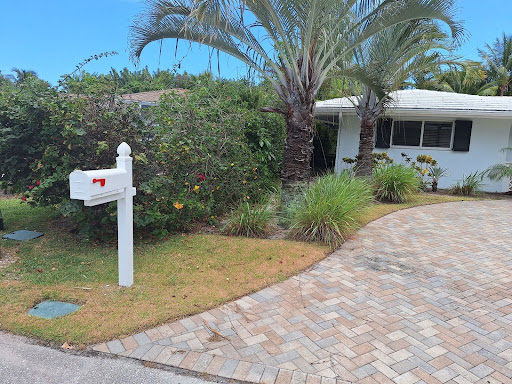
- (1) Photo from the street looking at the home / building showing the side of the home in large view with the property. We need to see what the accessibility looks like for the trenching we would need to dig, so the ability to see what if any landscape or hardscape or utility obstructions might be in the way are helpful for us to evaluate.
Photo /Video 1 example; from street showing the access to the side of a home or building

2nd Photo / Video type needed: If drainage problem is in backyard or the side of a home or building
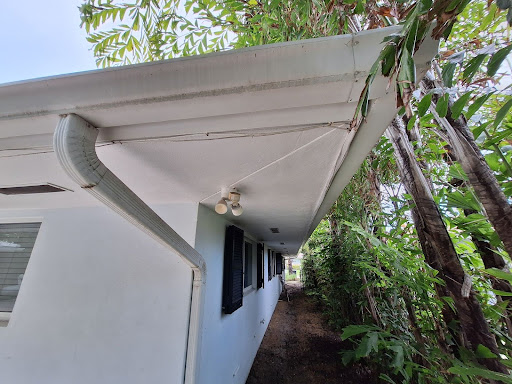
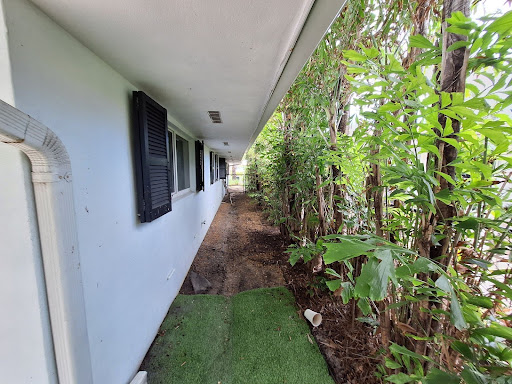
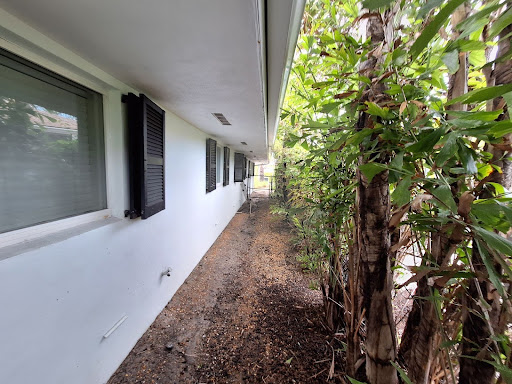
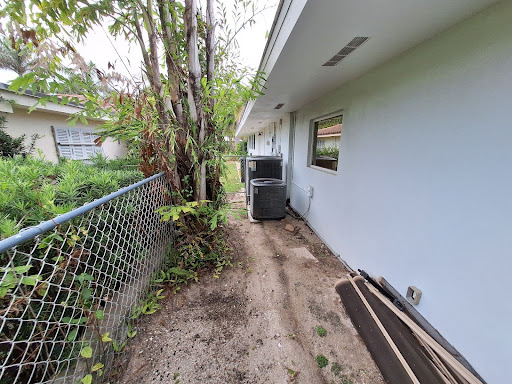
- Need photos / videos showing the sides of a home and the location of gutter downspouts if the home has gutter downspouts.
- If a home or building does not have gutters, we still need to see the side of the home or building
- This helps us to see the very important location of the gutter downspouts which our drainage system would be connecting into. (the piping we install below the ground, connect into these gutter downspouts, collecting the roof water directly into the new drainage system)
- Other benefits these side of home photos help with is to see the location of any bushes, trees, air conditioners, pool pumps, air conditioning drip lines, paver or stone walkways or hardscape areas on the sides.
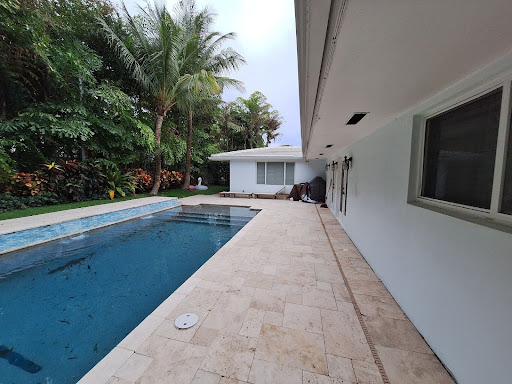
- Photo samples here : the drainage challenge these homeowners experienced was that the pool channel drain was not working properly and was not evacuating water well enough from the pool patio area and the rain water during storms was rising on the pool deck and threatening to come into the home. Photos of the back of the home, the gutter downspout locations, the channel drain in the deck – as well as – the locations of all of the gutter downspouts on the side(s) of the home were necessary to help evaluate the situation. The photos taken here, being shown as examples of wide angle views are helpful in evaluating the situation of the property, the gutter downspout locations and the characteristics of the property as well as any obstructions or obstacles for the trenching required to install a drainage system.
- Photos here below help to show how to take wide angle views that show both the home and the property so a larger scene, and what area of the property and home is able to be viewed together.
- The elevation difference that became a significant issue can be seen in this above photo. The property level at the fence to the left and the rear is higher than the pool deck in this property. This resulted in water from the neighbor’s property that added to the water in this yard, but with reduced area to handle that water flow with the new construction that was about to take place, increased the concentration of all of that storm water and was not able to leave quickly enough.
Construction of guest house begins with foundation
3rd Photo / Video type needed : If drainage problem is in backyard or pool area
- Holding phone sideways for photos / videos is most helpful and videos, especially during a rainstorm is more helpful than anything else in evaluating the drainage problem.
- Showing the larger home and backyard area in view together.
- Showing areas of the property in relation to the house. When photos or videos are too focused in on an area, or close up, it can be difficult to determine the extent of the problem sometimes or tell where exactly in relation to the home and property the photo / video was taken.

When taking photos of the sides of the house, we are looking at the area to determine where the Gutter downspout locations are and any obstructions for the trenching and Drainage System piping that we would be installing.
The photo below shows in the right side of the photo, that a connection into the the existing gutter downspout of the home is being made. Also, visible is the location of the fence, the fence gate, an air conditioner unit, a power meter on the side of the home and a 2nd gutter downspout on the side of this home at the rear back corner as is in view at the left side of the view in this photo of the house; the rear gutter downspout on the corner. This picture is a close up view of all of these points that do have an effect on the installation of the drainage piping on the side of the house.
A view, also from the street showing the view to get to the point in the side close up is needed, as below here.

This photo shows us a mature tree in the front and an irrigation valve box (green cover) left middle at bottom of photo and a city water meter which is the concrete rectangular shape just a few feet away from both the mature tree and the irrigation valve. This photo also shows us a view to the fence. A difficult area to dig through and also, there would be utility lines in the first 10 feet from the street which made the digging even more difficult to navigate. These kind of obstacles can create a longer time to perform the excavation and can affect the price as well.

The photo below here is a needed photo, the street view which is very important. This shows us the view right from the street going back. As the Drain Box that we install for the Outflow point of the system is installed typically within inches of the street to discharge the water from the drainage system, we need a view, right from the street.
The photo below shows the side of the home where drainage piping is to be installed, an opposite view from the one looking towards the back with the piping being installed. Helpful at times to have reverse angles to show different sides of a fence or a pump, generator or an air conditioning system unit.

The photo below shows the trenching for the drainage system before the PVC piping is to be installed. What’s notable is where the trenching is and the importance of knowing the location of the gutter downspout on the corner of the home.
For this residence, there was only 1 gutter downspout across the back of this home, the other downspout for their roof was on the zero lot line side, behind the white fence behind the house in this photo. The part of the home which is completely almost owned by the neighbor for the Zero Lot line portion. Often times a person will own a 2’ easement of space from the wall of their home on the zero lot line side and still require permission from Hoa’s quite typically for permission to install the drainage system.
To help collect the roof water for this residence and to move it better through the backyard an attachment was made off the rear of this home on the Zero Lot line side that was primarily owned by the neighbor behind the white fence coming off the house.
Permission was granted by the neighbor and the HOA and the piping went to the side of the home behind the white fence and the water was collected and used to push through the back of the property in this instance, adding force to evacuating the collected roof water for this home.
The photo showing the gutters across the back of the home as well as the trenching area is notable, as we are looking for larger views, again showing the gutter downspout locations and any potential objects or obstructions and where the drainage trenching may be. So, when taking photos, big views like this, showing the property and the house, are most helpful.

Contact us for a Initial Inspection

If you’re ready to talk about the project that’s been on your mind, or you just want to spruce up the yard – give us a call today – we’ll work hard to make you feel glad you did!
(561) 448 0595
